

Shadow of the Tomb Raider: Walkthrough
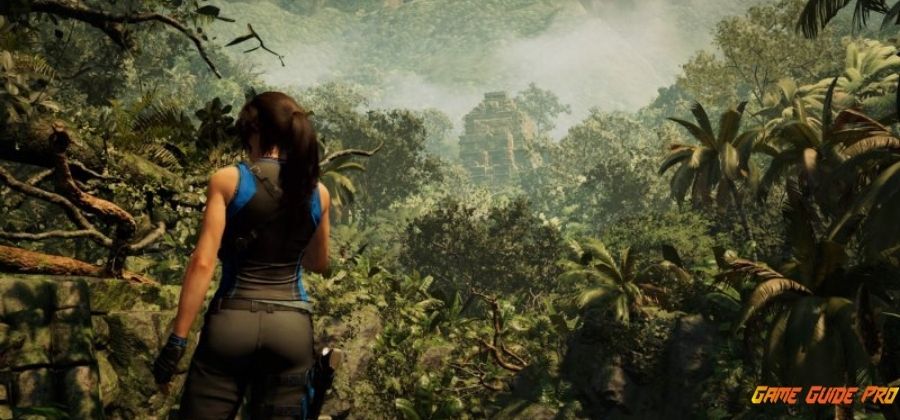 Shadow of the Tomb Raider begins with a scene in which you see Lara Croft stranded in Mexico. The heroine will get stuck in a narrow gorge, and we need to help her get out. Press the action button until Lara is free. When you complete the action, follow the ascent up, jump in the indicated direction and press the button that will allow you to use the ice axes to move along steep surfaces (“E” or “Space”, depending on the settings).
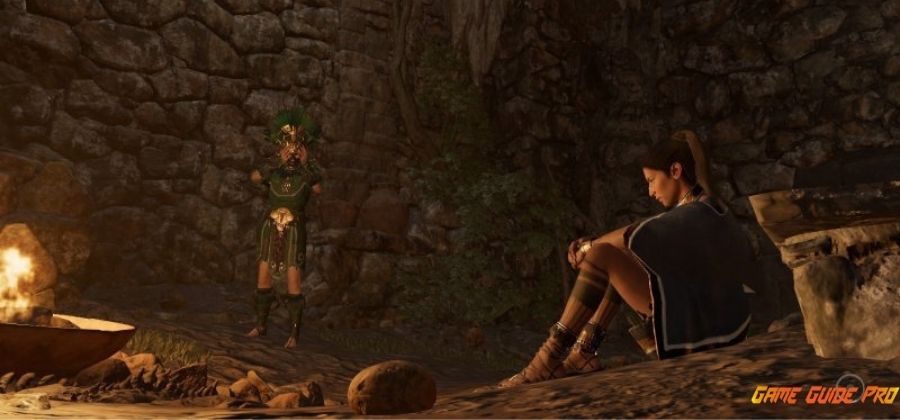
When Lara rises, press the same key, helping the girl to hold on and not fall. Be prepared to repeat this quite often, as, in the story of the game, such situations will occur all the time. When you find yourself at the very top, go to a special illuminated structure, and then watch the scene with Lara and Ina leaving the cave.
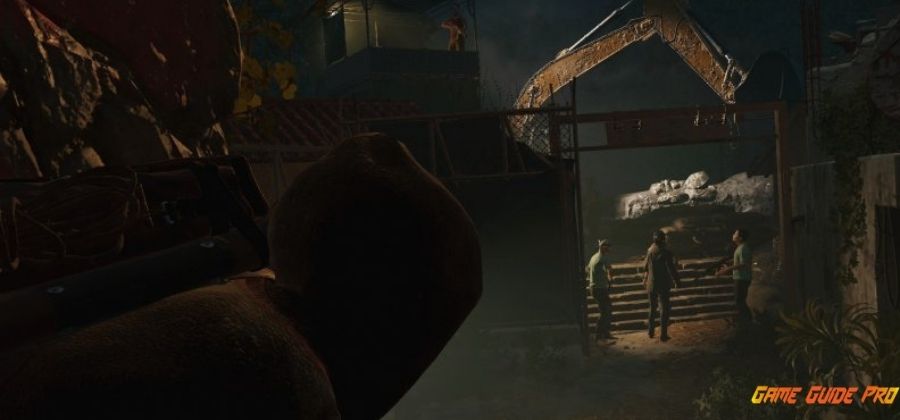 The next place of action is a small Mexican settlement, through which you can move freely. On the way to the place marked on the map with a marker, you can chat with the locals. However, keep in mind that they will not give you any tasks, for now, so use the time as you see fit. You need to reach the gate, near which there are several people. Iona will distract them, and the player needs to get over the fence unnoticed. We move further towards the excavation, bending around the mercenaries until the next cut-scene starts.
We go to the Temple Shadow of the Tomb Raider
The main goal here is to find an alternative path to the excavation site. We leave on the right side, climb the cliff, until we find ourselves outside the city limits. Starting from this location, you can use the weapons available to Lara.
We set off along the only currently available path to the place of further actions.
Along the way, you will find the first enemy, which you need to stun unnoticed for everyone. A little further there will be a second enemy, which you will have to eliminate with a bow (aim at the head, so you will kill the fighter quietly and from the first hit).
Then you will talk with the rescued person, after which we go up the wall to the ledge and watch the next video. Again, we go along the cliff, jump towards the ruins, grabbing the wall with ice axes.
When you hang on it, press the left mouse button and go down the rope. Get down as low as possible – so you can jump onto the ledge without taking damage. We continue to move sideways along the wall. We jump to another wall, again we go down to a new ledge. We repeat all the same, after which we move along the part of the wall marked with white paint, swinging from left to right. We jump in her direction, after which we move further to the right side. We descend again with the help of a rope, swing again, and jump again. It is important to note the moment when Lara herself will point in the right direction with her hand. This is a sure sign that your jump will be successful.
Wait for the sign and jump over to the other side – now we can penetrate the ruins and follow on.
Also Check: Assassin’s Creed Odyssey
Temple Shadow of the Tomb Raider
Having squeezed into a small passage, Lara finds herself inside a small room. Here you can find the first collectibles: a fresco and a monolith. Collect them as soon as you notice, they provide some bonuses and allow you to learn more about the in-game world.
To go further, use a bow and arrow with a rope tied to it. Shoot at the obstacle with an ordinary arrow (aiming at the rope, Lara will choose the right projectile herself), then pull the rope and destroy what is blocking your path. When done correctly, only take a few steps forward. You will find yourself in front of a trap that can immediately kill your heroine. To get around the trap, cut the rope with a knife and activate it earlier. After that, bend down and crawl under the thorns, bypassing the deadly area.
Then we find ourselves in a room with a reservoir. It is necessary to dive under the water and swim at depth to the next room. To move faster, hold down the Shift key while underwater – this way you get over the problem area quickly and can save air in Mrs. Croft’s lungs. Also, do not bend around special areas called air pockets here. They allow you to restore the supply of oxygen and swim further without consequences. At the very end of the underwater path, you will need to squeeze through several walls again, do it as soon as possible and get out on land.
When you get out, go forward and get rid of the next trap (it will already be familiar to you – the spears protruding from the wall). After that, a room with a pyramid awaits you, Lara needs to climb to its very top.
We go to the Pyramid Shadow of the Tomb Raider
First, we go to the suspended objects, shaped like a bell. We jump to the wall and grab the ledge.
We move further, shooting at the obstacle from a bow with a rope, destroying the obstacle on the way. Then we push the cart, dropping the counterweight. We return to the place with the bell and you will see how the path to the partially destroyed staircase was opened.
You will find yourself next to a log and ropes. Use a bow, shoot another rope knot, connecting two different objects. Thus, you create an exit for yourself for further movement – move along the rope to the next side. We see the bell again, we move towards it. Jump over to the wall and climb a little higher to the ledge – at the top, you will find the first puzzle.
Here you need to deal with a large obstacle that blocks the path further. Find a cart in the room, push it in the center – on an octagonal wooden platform. Then go to the upper mechanism and interact with it – so you can return the platform with the cart located on it. Here you need to make sure that the cart turns to you with the side with the rope knots.
We remain in the same place. We shoot from a bow with a rope arrow into a knot on the cart – this way you can again fasten two different elements: the cart and the mechanism. Using improvised ice axes, lift the cart to the slope, then move to the rope and cut it with a knife. The solution to the puzzle will end with the cart crashing into the obstacle and freeing your further path.
We jump again from the bell to the steep stairs, climb to the slope and move towards another cliff. We jump again, after which we go down on the wall and move to the top of the pyramid. From here, Lara can go down with a rope.
When you find yourself in place, the game will turn on a video in which Lara will receive a certain artifact – the Chuck-Shel key. After completing the video, we head towards the exit from the ruins. At the end of the path, you will see a wall that can be destroyed with your hand-ice axes. Do this and move on to the next story chapter.
Excavations in Shadow of the Tomb Raider
Here opponents will appear, with whom you need to deal. Best of all, if Lara will eliminate them one by one, acting stealthily. Use environmental elements for this, hiding behind ledges, in lush bushes, and next to walls.
First, we get rid of the enemy near the generator, then move to the location with two mercenaries. When a yellow marker appears over the enemy’s head, you can stun him without fear. This designation makes it clear that none of his partners is watching the enemy, so you will not raise an alarm. If the marker is red, then it is better to wait a certain amount of time until the color changes to yellow.
You can use empty bottles to distract one of the fighters. If you have the resources to create explosive mixtures, then use them – hot cocktails will allow you to immediately get rid of a group of opponents.
When you deal with the nearest soldiers, move to the wall and eliminate the patrolman. If you want to act from afar, then use a bow and shoot in the head. Also on this location, many materials are best to pick up – in the future, you can use them to make grenades.
If none of the nearest fighters detects you, then Lara’s first open battle awaits near the gate. From the helicopter, mercenaries dressed in armor will begin to move towards you – you can’t kill them with one shot, so you don’t have to aim their heads too much. With Trinity mercenaries, you need to fight carefully, act agilely and do not stay in one place for a long time.
After the battle, go to the gate, open it with ice axes and wait until the next video starts.
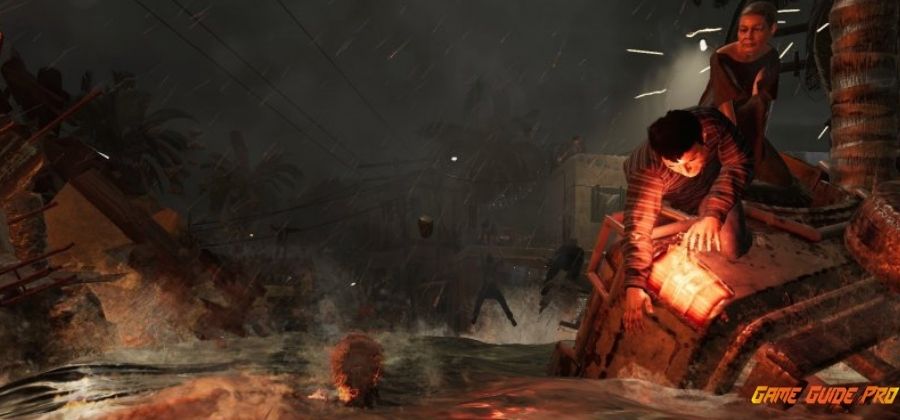
Tsunami in Shadow of the Tomb Raider
It so happened that Lara’s actions caused a real natural disaster in the village. When the water rushes into the city, move left and right, avoiding being hit by debris. If you miss two or three pieces, then Croft will die.
 When the game returns you have full control over the character, swim towards the exit. Shadow of the Tomb Raider Remembers to replenish oxygen by using air pockets that get in the way. When you find yourself in front of the door, use the ice axes to open the passage further. Again the wave, and we make our way to the wall and grab it with ice axes.
When you find yourself on the wall, move towards the bluish ledge on the building. Move carefully and try to make sure that Lara does not lose her balance. When you reach the end, jump and climb higher – another cut-scene awaits you at the top.
Shadow of the Tomb Raider In the Peruvian jungle
We go along the only open path in the jungle until we get to the place where the signal flares were fired. We go along the narrow ledge above the abyss and jump from the tree. We go down the slope until you see the first camp in front of you.
The camp is where Lara Croft can spend her accumulated skill points to unlock new skills. We need to get access to a knife and an ice ax, with the help of which we will further make our way into parts of locations inaccessible for simple movement. According to the plot, we need to find the location of Jonah.
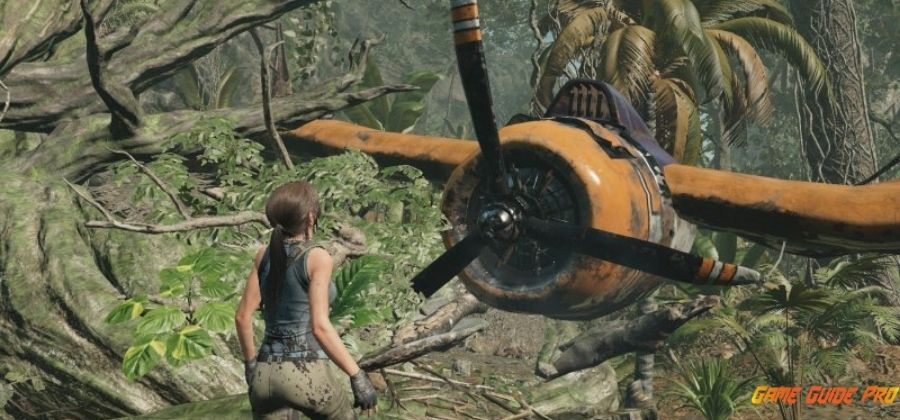
When you finish exploring the camp, move to the spacious area next to the camp. There you will see a pond in which part of the crashed plane is floating. When you approach the aircraft, the propeller will fall off from it, and you have to follow it under the water. When you dive to the very bottom, interact with the screw, breaking off a certain part from it – it will become your blunt knife. A predatory fish will appear next to you, and it will be possible to deal with it with the help of the found object.
After the battle, we return to the surface and cut the rope with a knife. However, you will realize that he is too dumb (a knife, in the sense) for this task. You will need to find three toolboxes. Here you can search for them yourself, or just go where the marker points on the map. When you have done all this, return to the camp.
We sit down by the fire, open the tab of your inventory. There, use the functionality to create the first item, a homemade knife, with which you can cut the unfortunate rope. First cut the first, and then the second rope, which is located nearby – climb the tree to the ledge, and you will see it.
After clearing the passage, we move to the place where the cargo was dropped. There you will find a bow that can be improved in the same camps that you will encounter as you progress through the story campaign.
Explore the western part of this location and find two different nodes. You need to connect them with a bow.
Shadow of the Tomb Raider Jaguar
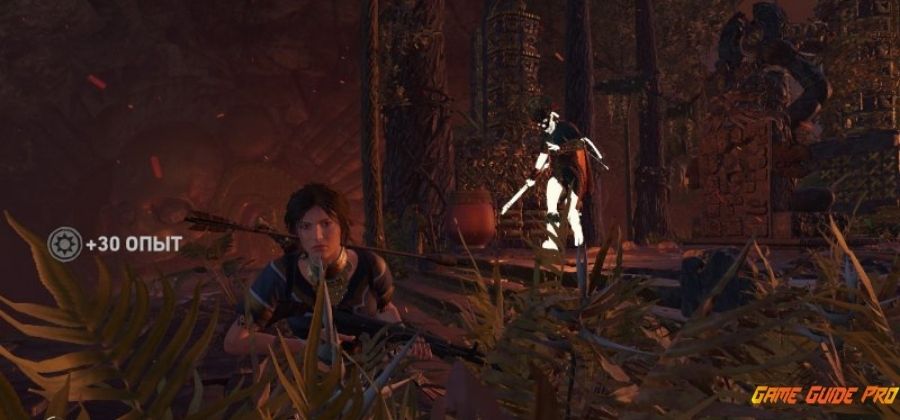
In the video, you will see that the main character found herself in the territory of predatory jaguars. A little later, you have to fight with two cats at once, and in this battle, you must not stop. Move constantly, avoiding enemy attacks, alternately attacking one enemy. Depending on what level of difficulty you have set, in the process, it will be possible to heal or not. There are numerous resources scattered across the field, which are best to pick up.
It should be borne in mind that to win this difficult confrontation you need to deal with one of the jaguars, so concentrate on one enemy. The most damage you can do, as before, aiming at the head. But this should be done as quickly as possible, not allowing the cats to get close to Lara to cause damage.
True, you will not be able to constantly avoid attacks; the first time you get into trouble, the game will launch a QTE scene in which you need to press the keys according to the directions from the screen. When you deal with one of the jaguars, the second predator will hide in the thickets, and you can continue your journey further.
We rise to the wall, where we find the wreckage of the plane. We go along the only open path, climb the stones and slide down. In the end, you will meet Iona and can use the hand ice axes again.
Shadow of the Tomb Raider Playing with Jonah
After you unite with Jonah, you will have to face a new obstacle that can only be overcome in company with him. These places will be marked with the figure of two people, and you will immediately understand that you will have to perform joint actions with Jonah.
When you find yourself near the destroyed bridge, move to the left and climb the tower. We will see a special mechanism that will allow us to manipulate the flow of water. We go back a little, go down, and find another mechanism. Lara and Jonah must work together to drain all the water into a green counterbalance container. Keep in mind that there is a hole in the container so that water will gradually drain through it. Accordingly, you will need to complete all further actions faster, otherwise, you will need to start all over again.
We run back, we go down the path under the bridge. We shoot from the bow at the rope knot and tie the rope to ourselves.
Climb up and again, together with Iona, activate the mechanism, remove the obstacle from the other side. After that, a new video will start. After completing it, you will have access to the manufacture of special potions called the Eagle Eye. With its help, you can sharpen Lara’s perception and quickly find any necessary resources.
We go outside, move to a new obstacle, which, again, can be removed by the heroes, acting together.
Shadow of the Tomb Raider Fight with the second jaguar
If you thought that the predator who escaped a little earlier forgot that you killed his relative, you are deeply mistaken.
To get started, use the flare gun, and then perform the already familiar actions in the battle with the predator.
Use a bow, shoot an animal in the face and dodge its attacks. When you are done, watch the new video and search the location, picking up the necessary resources. We return to the barrier, near which Jonah is waiting for you. Here we fall asleep and see a dream in which still very young Lara Croft is walking around the family mansion.
Shadow of the Tomb Raider Croft Manor
We move to the playground. Here you can find several collectibles from the heroine’s past: letters, photographs. You can also get a special achievement by throwing the ball at four different objects.
Throw the ball into the crow’s nest – successful throws will lower the stand on which the picture of Lara’s parents is located. We leave into the garden and examine the wooden wall. We go up to the balcony, make our way under the living room window and use the ledges to move further to the right.
The further goal is a ditch. When you finish watching the video, head to the right side. We rise to the roof and squeeze between the scaffolding. We use the stairs, move along the narrow section of the roof until the next cutscene starts. After descending to one of the balconies, we penetrate the house and move to the door. She will lead you into a spacious hall, where we need to solve the next puzzle.
Shadow of the Tomb Raider The riddle of the White Queen
At the very beginning, we need to determine the correct coordinates, which are indicated in the drawing of the main character. We examine the globe, on which we set the desired values: 30 degrees north latitude and 90 degrees east longitude. When you do everything right, a staircase will appear, along which we go upstairs. There we find a mechanism when interacting with which we open the wings of a large bat. We direct the red light to the bottom landing, moving the pieces to the edge of the board. Make the red light reflect from the shields of the knights onto the walls under the stairs.
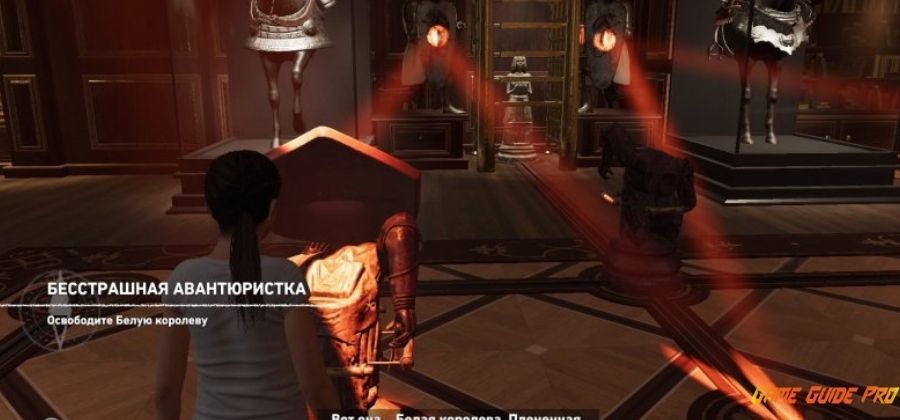 We return to the globe and change the coordinates to any other. The staircase will disappear, and Lara will be able to reach the figure of the White Queen. Move it to the platform with the knights and set it so that the red lights are on either side of the Queen. After that, you will see a new video, Lara herself will wake up and you will continue your journey through the jungle again.
Shadow of the Tomb Raider Return to the Jungle
Take a look at your inventory before continuing on your way. There you will find a new thing – a vest that Miss Croft got after a successful battle with the jaguars. If you do not have better things at the moment, then put it on – the vest will provide you with bonuses when eliminating opponents from an ambush.
Then the adventures with Jonah continue, jointly eliminating obstacles on the way. A little later, Lara will find herself in an area that you have to study on your own. By the way, you can go back a little and inspect places that were previously inaccessible to you. Use ice axes to penetrate inaccessible areas (the locations of the secrets were described in our early materials, and most of the mysteries are marked on the map when approaching them).
Next, you will face a battle with Trinity. Here it is imperative to act secretly (the vest found earlier will come in handy), otherwise, you will be quickly killed by a mercenary who is behind a machine gun in a car. First, it is best to deal with the enemy near the vines, after which we carefully move to the left, approaching the car. After reaching the ledge, deal with another fighter. Watch the video a little later and neutralize the remaining opponents.
We go up again and watch the video again, after the completion of which Lara will have two new types of weapons at her disposal: a pistol and a machine gun. We pass into the cave and run into an obstacle, from which you can get rid of with the help of fire. Near the barricade, the game will give you everything you need to craft fire arrows if you don’t have them yet.
When the main characters get to Kuvak-Yaku, go down the slope to the village. There you need to find Abby, with whom you can finish the quest. We pass on to the next chapter of the passage.
Shadow of the Tomb Raider Adventures in Kuvak-Yaku
Lara finds herself in a very large village, where you can turn in the first side quest. Also here your heroine can exchange things with a merchant, find many secrets and visit tombs.
If you want to continue with the story mission, head to the ruins in the north of the village. Go inside, watch the video and continue exploring the area. We leave the large building and dive under the water, squeezing at the end between the damaged boards.
We find ourselves on the territory of the Trinity outpost. To avoid meeting opponents, you can continue your journey underwater. Or dive ashore, but then you will have to deal with a large number of well-armed mercenaries. The best moment to attack is when the enemy gets close to the water and stops on the shore. There are practically no shelters on this territory, so in case of a battle you need to act quickly, otherwise, the enemies will simply shoot you.
Further, you will find a camp of mercenaries, which you can walk along the only free path. To disguise, smear yourself with mud – there is plenty of it here and Lara can merge with gray surfaces or hide in the bushes. Here you can stun or kill targets with a bow that stands aside from the main forces of Trinity. And with groups, you can deal with grenades, Molotov cocktails, or distraction by throwing any improvised objects.
Shadow of the Tomb Raider Locked gate
When you are finished clearing the area of enemies, find the doors leading to the adit. You can open it with the help of improvised ice axes. We jump onto the wall, cling to the ledges, and go down the rope. You can explore this location calmly, there will be no enemies that can interfere with you.
Further, you will find a spacious room with a gate on which there are two interactive objects. We need to rotate the plates so that we get the desired position. On either side of the door, you will see two passages that lead to adjacent rooms. It doesn’t matter where you go first – each passage will lead you to locked doors with symbols that will come in handy in solving the puzzle.
 After looking at the symbols in the adjacent rooms, we return to the main gate and interact with the mechanisms. When you try to do this a second time with a different gate, the floor under Lara’s feet will begin to crumble. We return, on both plates that you saw earlier, new elements appeared – again repeat the manipulations with the mechanisms.
And again the gate, and again we interact with the familiar plates. This time, Lara herself will invite you to look at a photo from the album. You need to rotate the Mayan calendar so you can see the symbols you want.
Now we use the plates again, and this time we solve the riddle completely.
Passing through the last gate, we find ourselves in a room with a fresco. When you start moving in her direction, a video will start in which Lara examines the find. After the end of the scene, squeeze through the narrow gap and leave the hall.
In the new room, you will find a monolith – from that moment on, your heroine will be able to deal with enemies by jumping on them from a height.
We approach the cliff and jump into the water. Now you need to avoid meeting with underwater predators, which can damage the tomb raider. The survival skill will help you in detecting the enemy, which will mark dangerous opponents with red markers. To avoid getting into the field of view of fish, you can use underwater vegetation or simply swim away from the enemy.
When diving deep, remember that oxygen is limited. Use the air pockets to refill it and swim to the eastern part of the location. There you can get to the surface and leave the dangerous ruins.
Shadow of the Tomb Raider A new path through the Jungle
We continue to move along the marker, we find new opponents. Now you can deal with them by jumping from the tree. Climb the nearest hill and wait for the nearest mercenary to be below you. A special marker will appear above his head, after the appearance of which you can use the bow and hang the mercenary, having dealt with him silently.
By the way, in the future, you will be able to upgrade your Eagle Claw skill, which will allow you not only to hang the corpses of enemies but also to hide them in the lush crowns of trees. This guarantees the most secretive destruction of the mercenaries and the absence of the risk of raising the alarm if a partner discovers a corpse.
We move on, squeeze through the trees and find ourselves in a new location. It is best to covertly deal with simple enemies when they are far from colleagues. The main danger is an armored mercenary on the wreckage, it is best to kill him from behind, having previously dealt with less dangerous opponents.
Climbing the nearest ledge after the end of the fight, Lara will find several more dead Trinity mercenaries, and this chapter of Shadow of the Tomb Raider will end.
Shadow of the Tomb Raider Jaguar and Spider Trial
We find Iona and Abby at the entrance to the ruins. We approach a small hole and watch the video, after which Lara will be in another place. Now you need to pass a new test.
We jump from the stairs into the water, we float into the large hall. We squeeze through the gap and quickly move on – there is little oxygen, we need to hurry. Having dealt with the eel that attacked you, we move to the next air pocket. Here you need to get to a narrow passage between the rocks, after which you can finally get to the surface.
We go to the wall with a red silhouette, we rise to the ledge. Using an ice ax, we rise even higher, after which we move through a narrow corridor. Use the ice ax again in place with the image. Swinging in the air, make a long jump in the right direction. We need to get to the hole above the red spider, after which, along the corridor, we will find ourselves in a new room, where we will need to pass the test.
Shadow of the Tomb Raider Eagle’s Trial
We pass to the side along the ledge, bypassing the camp. There will be another ledge above the abyss – we go there. When you find yourself at the foot of the tower, the test will begin. Watch out for moving mechanisms – most of them can cause Lara’s death. Also, carefully watch where you are jumping, as any mistake here can cost you your life.
Grasping the ledge below-right, we move to the opposite side. When you get to the climbing wall, rope down to the platform. We move to the other wall, starting from the opposite one, we move to the right to find ourselves outside the tower. Again the wall, now we need to go down along it using ice axes. Use the rope, swing, and run across to the other wall. Now we rise and find ourselves near a device that visually resembles a sail. Stopping next to him, shoot at the rope knot from the bow on the central column.
You will find a movable mechanism in the center of the tower. Jump onto the stairs when she is in front of Lara. We rise, bypassing the deadly traps. Next, you need to wait until the movable structure of the tower stops in a position that will allow the girl to move forward. We find ourselves in front of a large ledge, moving along the beam and jumping into the hole.
We jump over to the other side after we have visually found another sail (we cannot reach it yet).
Here you need to get further to the top, bypassing the traps. Wait for the device to pass you, go up, and turn right at the top. When you find yourself near the second sail, find a rope knot and shoot at it, destroying a part of the wooden structure. In the damaged part of the tower, you can find a lever, hook onto it with a rope and pull. The passage on the right opens up for a short time, so you need to hurry to slip through there.
Shadow of the Tomb Raider However, you can do otherwise – go to the piece of wood on the left and shoot the lever. This will tie the two elements together and lock the lever in position to keep the passage open. We return to the second sail, shoot from a bow at the central part of the tower (there will also be a rope knot there), destroying its next area. We jump onto the stairs on the central mechanism. We rise along the beam to two climbing walls.
When you see a ledge at the red part of the central structure, jump onto it. Then jump to the other two ledges again.
We rise to the highest beam and move to its end. After that, jump to the wall and catch on with ice axes.
We go down the rope, swing, and jump to the right side (Lara will point in the right direction with her hand).
Climbing a little higher, we find ourselves near the exit. We move along it to the wall, jump, grasp, and again jump onto the stairs. Now you just need to get to another camp, which will begin the task in a new location.
Shadow of the Tomb Raider Meeting with Unuratu
Now you find yourself in the Secret City – in another very extensive location. As Unuratu advises you, it is better to spend some time exploring the surroundings in which you have to spend a lot of time. Be sure to visit the merchant and buy some helpful supplies. Also, analyze the presence of secrets and hidden mysteries here with a high reward.
 To continue the storyline, we go to the shopping area to the bridge. Here you need to approach the crowd of people from the indicated side and watch the video in which Lara receives a photograph of Amaru.
Shadow of the Tomb Raider Exploring the Maw of the Serpent
In the western area of the settlement, we meet with Etzli. After the dialogue, squeeze through the narrow gap and explore a new location.
We move to the abyss, jump over to the beam and move to the wall, clinging to it with an ice ax. We go down on the rope, swing, and jump towards a large ledge.
During the next jump, we throw the ice axes forward and rise to the Womb of the Serpent. We squeeze between the walls, go along the narrow beam and jump towards the other wall. Again we use ice axes to climb, descend on the rope and make a jump. You will find yourself in front of the cage, but you need to move towards the other cage.
Shadow of the Tomb Raider We rise along with it and find ourselves on a narrow ledge. We go to the side, we reach a place with a cliff and prepare ice axes with a rope. We go up along it until we see a suitable ledge on the left side.
Again the wall, another climb up. We use ice axes, we descend on a rope to the balcony under the wall (bloodstains will point you to the desired area). We move along a narrow passage with corpses until we find ourselves in a room with an enemy. The cultist is unaware of your presence, so you can eliminate him without raising the alarm. Then you can examine the corpse on the altar, then find the weak part in the wall and destroy it with an ice ax. You will have a passage to
Head of the Snake, where the next stage of the story begins.
Shadow of the Tomb Raider SnakeHead Exploring
We go along the linear path until we see a large ledge in front of us. Jump to the wall, grab the surface with ice axes, and climb down the rope. We swing, jump and proceed to a new test.
Examine the wall to the left of the pieces of wood, on which you will find a lever with a rope. If you shoot her, Lara will be able to fill a special container with a flammable substance. We approach the mechanism in the center of the room, interact with it, and set fire to the fuel. The fire will burn the obstacle on the way and you can go further.
Now you have to go through the second obstacle. In the area, you will see two wooden columns, the highest of which has a mechanism for interaction. You need to move the platforms below in such a way as to connect the channels and create a path for fluid to the obstacle.
Shadow of the Tomb Raider You need to tie two columns with a string. We stand near the low one and shoot from the bow at the high one. Now you need to rotate the tall column using the handle. We adjust the correct pattern under the low column in such a way as to unite the two outermost figures with one middle one, which does not move. Having straightened out with the small pattern, we cut the rope and do the same with the large one. After completing all the manipulations, shoot from the bow at the lever and rotate it with the help of the mechanism, setting fire to the liquid. In the opened passage to the room, you can move to the location where you will find the Ish-Chel key.
Shadow of the Tomb Raider Escape from the Cultists
When you get your hands on the key, we rush to flee from our pursuers. Here you should not try to fight your enemies, otherwise, they will catch you and are guaranteed to kill you. On the way to the rescue, you just have to run, bending around some obstacles and performing single jumps. In general, you shouldn’t have any problems here.
After you break away from the cultists, go to the Secret City. You need to find Unurata in his hideout to complete the current task.
Shadow of the Tomb Raider Temple in the mountains
Until now, the entrance to the temple in the mountains was inaccessible to you, but now you can get there. We pass to the northern part of the Secret City, you will find a passage near the monolith.
Once inside, move towards the large hole. We climb up the wall, then we go to the rock and we go down with the help of the rope. After the video, we continue to follow straight, without deviating anywhere. We make several jumps, go along the narrow ledge sideways until we see the camp. We pass it, going down the rope.
Next, you will face a battle with cultists. Here you need to constantly move, shoot on the heads. Keep in mind that some of the opponents will have a headdress, so you won’t be able to kill such an opponent with one hit. When you deal with the first group, go to the next room – where you will find the following enemies. If you have a smoke bomb, then the best time to use it is to throw a projectile into the crowd, blinding them.
Another location will be found near a large gate. Here it is best to act covertly, having found a puddle of mud nearby. Disguise yourself, merge with the surroundings, and shoot at the red container when the enemy is near it.
After the end of the battle, we follow to the rock, located on the right side of the gate. In the next video, you learn that Urunata has been kidnapped, so you have nothing else to do in the temple. We leave the temple, go up the right wall and follow to the place from which you can jump to the next ledge. Then we ascend to the next height, descend on a rope, and, using a wall with white paint, we get to the ledge. Take out your ice axes and grab onto another sheer surface.
When you go downstairs, you will find yourself on a ledge surrounded by water. Use ice picks to cling to a fallen tree, get over to the other side and go into a cave with waterfalls. We jump towards the central wall, after which we dive under the water. We swim along the underwater corridor, get out to the surface and find ourselves in a new location called Cenote.
Shadow of the Tomb Raider Silver box Ish-Chel
We move to the rope, grab it and move to another area. While moving, you can jump into a body of water (at a specific location), the exploration of which will allow you to get several collectibles. Then we swim to the ruins, after falling into which we continue to complete the story quests. While underwater, watch for air bubbles, which will indicate the presence of an air pocket.
We rise to the surface, look around. Nearby there is a spiked trap that can be defused in a slide or simply cut the rope. We work inside one big hollow, overtake that music plus slope to its height. We jump to the ledge and move to another rock. We go down on the rope, swing, and jump to another ledge.
Shadow of the Tomb Raider After reading our other material about the tombs, you will find out that it is here that one of them is located. If you do not want to explore it, then move on through the cave, reaching the ledge. We rise along with it, carefully jumping along the ledges (count the jumps carefully, otherwise you can fall into the cliff). You need to get to the ledge, near which there is a suspended corpse of one of Trinity’s mercenaries. When you get to him, cut the rope – the body will fall, and you can pick up a new weapon from it.
The shotgun that you find will allow you not only to deal with enemies but also to eliminate strong obstacles on Lara’s path. In the ruins of the temple, you will find one of these obstacles – destroy it and go along the opened path. In the end, you will meet the inhabitants of the temple, who are not too good-natured.
In a fight with opponents, you need to use both the previously found shotgun and a rifle. Use the first weapon on enemies that are close to you, and the second – to eliminate opponents using bows. Be careful, in close combat, savages can inflict colossal damage, so do not forget to use the rolls. You can also aim fuel barrels from a rifle – by blowing them up, you can eliminate several archers at once in one shot.
 Shadow of the Tomb Raider After the end of the battle, find a wall along which Lara can climb up. At the end of the path, you will find yourself in a room filled with water. We jump into the water, swim to the right and forward. We get out to the surface and approach the mechanism. Tie the columns to the flywheel using the arrows and rope. When you’re done, you can rotate the columns to adjust the water flow. First, you need to connect the snake and turn it to the right, making way for the heroine on the right side. Climb up and destroy the wooden structures that hold the snake.
We return to the mechanism, again we rotate the columns towards the flywheel. We turn the two lower snakes to the left to allow water to flow onto the large wheel on the left side.
We jump into the water and wait for the moment when the spinning wheel will allow Lara to swim to another area of the temple. You will find a flywheel with snakes again, but now you need to destroy the boards that jammed the large wheel. We connect the flywheel with the snake on top with a bow, turn it in the direction of the wheeled container. You can now dive under the water by swimming to the boards on the other side. Destroy them, return to the mechanism and turn both snakes to the right side. When everything is done correctly, the gate will open and you will see the next cut-scene.
Keep in mind that all your actions with the wheels will be accompanied by attacks of savages, so do not forget to always be ready for battle.
Shadow of the Tomb Raider Escape from Cenote
The events with the pursuers are repeated, during which we do not need to stop and fight with them. We just run forward, using ice axes to cling to the ledges and escape the crumbling floor under our feet.
The pursuit will end at the water, where you dive, and the enemies will be left behind.
Shadow of the Tomb Raider Returning to the Secret City
We jump into the water, we swim into a small cave. When you get to the wall, climb it and jump onto the ledge on the right side. Having found a corpse, you will gain access to equipment that will allow you to move along the ceiling – until now, Lara could not perform such tricks.
We jump back to the cliff and test the equipment. Climbing to the very top, you will receive a new achievement. We go to a small hole and squeeze into a narrow passage. Again we perform tricks on the rock, we cling to the ledge. We go to the very end of the inclined rock, go down the rope. We swing at the very bottom and jump to the surface of the ledge, rise again and find ourselves on the upper shelf.
We continue to move left and up, using climbing equipment. Then we have to use ice axes to jump onto the rock on the opposite side. We find ourselves in another cave and jump into the water again. Piranhas are waiting for you here, so use the seaweed and float around until you get to the surface in Paititi.
Shadow of the Tomb Raider Rebel cave and meeting with Etzli
On the map, you will see a new mark – the house of Unuratu. But as you approach him, Iona will contact Lara and inform him that the heroine needs to find the cave with the rebels. On the wall next to the entrance, you will see a picture of a heron – this is a sign that you have come where you need to. Lara will put on a new suit. We do not recommend taking it off, as it will come in handy very soon.
We move to the bridge, which will lead us to the upper part of the city – we could not get here before, but new equipment will allow you to penetrate this area. Approaching the guard, we get permission to continue moving forward.
On the spot, you can find a lot of interesting items and chat with new NPCs, among which there is a merchant and a resident who issues side quests. When you finish exploring the area, move to the very top of the settlement, passing through the main gate. At the exit, you will meet Ezli and learn new information – a passphrase.
Shadow of the Tomb Raider Search for Unuratu in the Temple
At the entrance to the temple, guards will be waiting for you. We approach them, provide the password and go on. When you find yourself in the main hall, a video with the participation of Unuratu and Amaru will start. You can collect items in the temple, and then move through the only passage in the room to be outside.
You will not be able to cross the bridge, so we will start looking for an alternative way to the place of detention of Unuratu.
We go to the right, we go down along the cliff, swinging and jumping to the right side (the place for swinging will be marked with white paint). Now we climb up the ledges, and at the very top, we jump to another wall and cling to it with ice axes. After that, go downstairs and jump onto the platform. We go to another rock, climb it to the ledge. Using the hooks, we cling to them and jump over to the opposite side.
 We use the ledges, move along them until you see a rope knot in front of you. Stand in front of him and shoot a bow at the same knot on the opposite side. Using the rope, move to the ledges above the water.
We jump and secure ourselves on the ledge. We jump again and grab the wall with ice axes, and then use the rope and climbing equipment to climb to the very top.
When you reach a small ledge, jump through the hole to Unuratu’s chamber.
Shadow of the Tomb Raider Escape from the temple with Unuratu
In Unuratu’s cell, break the dilapidated part, penetrate it together with your partner. Once on the edge of the cliff, use a bow with a rope and shoot at the knot. Continuing to escape on the other side, grab the ledge. On the left, you will see a cultist who can be easily killed. Climb onto the new ledge, continue forward and jump onto the rock. In a jump, throw ice axes towards the rock, go up.
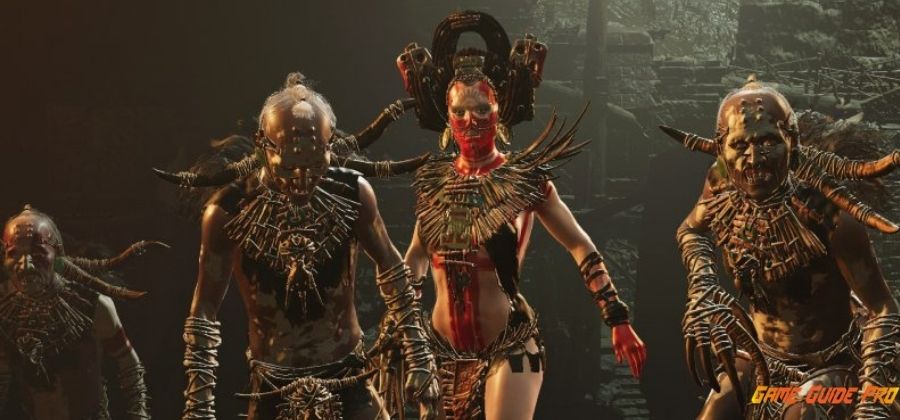
A little later, you will find another enemy, deal with him also imperceptibly. After the end of the video, we move behind Unurata along the bridge and enter the temple. Your movement will end with a scene with Amaru and a sacrifice. In the process, we get a photograph of the Ish-Chel casket.
Shadow of the Tomb Raider Shinichi Chick’s Tomb
The chapter begins with the moment when Lara is near the tomb of the Emperor. We need to go to the statue, go around it on the left. We grab the ice axes for a certain area of the rock (it is visually marked with such spores), moving to the right side of the statue. Use the ice ax to move to the left palm of the plinth. Jump towards the entrance to the tomb, making your way to Shinchi Chick’s grave. The further path will be linear, but you can find a few secrets here too. The movement ends with the discovery of a new room.
Now you need to fight the cultists using the surprise effect. It is best to act in stealth, but if you did not manage to avoid open combat, then constantly move and shoot at the barrels of fuel when opponents are near them.
When the battle is over, move to the exit and watch the cutscene. In the end, the scene will change to the Porvenir Factory.
Shadow of the Tomb Raider Way to the factory
The movement to the factory will be complicated by the fact that almost all of Lara’s weapons will be lost. Only ice axes and a small knife will remain, so you will have to covertly perform further confrontations with enemies. Don’t worry, as you progress you will be able to return almost everything you had, but the beginning of the mission will be quite stressful.
Once near the river, move along a linear route and try to either go around the enemies or eliminate them from an ambush. If you are noticed, then death can be avoided by camouflaging on the ground, fortunately, by this moment you should have already become skilled in this matter.
When you have dealt with the first group of opponents, climb the ledge, picking up throwing objects on the way. They can distract mercenaries, bypassing them. We rise and find the camp. We continue to move, accompanied by Rourke’s comments until you find yourself in a new location. Here you will find opponents equipped with thermal imagers. The equipment allows them to find your insight, even if you smear yourself with mud and hide in the bushes. Avoid getting caught in the cone indicating the hazardous area of the visors. They can be safely bypassed from the back (killed or avoided) while the enemy is exploring the area.
Turn off the generator and collect items with which you can craft Molotov cocktails. You can not fight with them – if you manage to bypass them, then you can immediately go to the next location. Again we bend around opponents with thermal imagers or destroy them with explosive mixtures. Having finished cleaning the area, we rise to the roofs of buildings and further along the ledges to the very top. The endpoint will be a place from which you can see the factory itself.
We start moving through the jungle until we hit the wall. You will have to jump to it and throw out the ice axes to grab onto it. We go down the rope, penetrate the cave and watch the cut-scene. After the video, you can get a bow and use special arrows, which, when the enemy falls, will cause frightening hallucinations in the latter. However, you will have to create them yourself, looking for the necessary items at the locations (the list of materials will appear when you select the use of a bow with alternative arrows in your inventory).
A little further, you can immediately experience the novelty – shoot the first enemy and enjoy the view when the enemy shoots his fellows and dies without your intervention. Move further to the western part of the location, destroying opponents secretly, using arrows, or simply bypassing the danger side. In the end, you will find an exit and listen to Rourke’s next message.
Shadow of the Tomb Raider Battle with Trinity at the Factory
After crossing the bridge to the plant, a new video will turn on. Runaway from enemies non-stop – a single hitch can cost your heroine’s life. At the end of the path, jump forward towards the metal structures. The end of the pursuit will be marked by falling under the water, and Lara will receive a new firearm.
It is best to test a machine gun from shelters, without going out into open space. Aim at the barrels – this will quickly eliminate opponents on the balconies. A little later, you have to avoid detecting enemies in a helicopter, which can kill you on the first hit. Again, you can use explosive barrels under the helicopter.
After the end of the battle, the next video will turn on, and Mrs. Croft will receive the next achievement.
Shadow of the Tomb Raider Secret crypt in Mission Saint Juan
You find yourself in a new location. There are merchants, tombs, and other secrets. To continue the passage of the story, go to Abby. There you will chat with her friend, who will send your heroine to the library.
We follow Jonah to the desired place, after which we watch the video.
To find clues that will provide us with information about the location of the crypt, it is best to search each floor in turn. First, we explore the first floor, paying special attention to the wall to the left of the entrance. It is blown out, so with the help of ice axes, we open a passage for ourselves to the big cross. After that, we move to the main room of the library and find the same destructible wall. We study the picture, remember the image of the heron.
We rise to the second floor, where we also find two destructible walls. Behind one of them you will find a collectible, and behind the second another painting, this time with an image of an eclipse. We go down below and find a picture with images of a heron and an eclipse. We find the fresco, then we move to the cross found earlier. Approaching it, you will start the video and the heroes will move to the very sought-after crypt.
Shadow of the Tomb Raider Search for the silver casket in the crypt
In this room, riddles based on a ray of light await us.
Move the cart so that the light hits the glass located on top. Thus, you will open the path to the statue, approach it from the left side.
 Jonah will give Lara a lift, and you can wipe the glass so that the light hits it and opens the way further.
In the new area, you will see two carts. They can be moved and manipulated by the position of the glass using special levers. First, go to the cart on the left and move it so that the beam hits the glass from above.
Use the lever while turning the glass until the beam hits the middle niche. We pull the lever and move to another cart. We move it under the beam of light, direct it to the image farther from the entrance. Pull the lever to trigger a cutscene in which Lara Croft will find a chest.
Shadow of the Tomb Raider Escape from Mission Saint Juan
To escape from this place, you have to deal with the most experienced and armored mercenaries of Trinity. Each of them has head protection, so there is no question of eliminating them from one hit. The best way would be to bypass them, distracting attention with throwing objects. If you are noticed, then you have to use firearms and grenades.
We move to another location through a narrow gap. On the spot, a new portion of enemies using visors awaits you. Cover yourself with mud and disguise yourself, bypassing opponents. There is another group at the end, so do whatever is convenient here: you can use the scary arrows and Molotov cocktails while moving through the trees.
The new area is again filled to the brim with mercenaries. True, here it will no longer be possible to go unnoticed since Trinity will have a helicopter at its disposal. When you deal with the enemies, move through the left building, open the door with ice axes and enjoy the next video.
Here is a surprise for you! You have to make a new stage of escape from the real mountain landslide. Just run forward, bypassing the pits (if you fall there, Lara will be covered with a deadly thick layer of mud) until you need to grab onto a thin metal pipe. You have to slide down the slope twice, and then move to a destroyed building drifting in the mud. Wait for the right moment and jump forward, clinging to the surface with ice axes – this is where your escape ends.
Shadow of the Tomb Raider Final Quest and Boss Fight
The mission begins with a conversation with Eszi, in which you need to confirm your desire to proceed to the final mission.
If you still have some tasks that you did not manage to do, do not worry – after completing the game, the game will give you full scope for traveling around the world. Before starting, it’s best to sit by the fire, carry out weapon upgrades, and put on the best equipment you have.
We swim underwater, avoiding objects falling on us. At the end of the path, we observe a new video, after which we simply move forward and try not to fall into the abyss. In general, we will not specify where and where you need to jump and what to cling to – by this moment you should immediately see the desired area (constantly marked), understand where to descend the rope and where to climb.
 At the end of the path, we meet Yaaxil – the queen of the local creatures. Now Lara Croft will join forces with them. We continue to move forward, we destroy the enemies that come across until the cutscene begins. In it, you will see Rourke sitting behind a machine gun of an armored jeep. Wait for the savages to attack common soldiers along with Rourke. Only they will be able to kill him, if you start to act earlier, then immediately perish.
Continuing forward and up the slopes, we reach Dominguez. At the time when objects start falling on you from above, we jump to the right and cling to the surface with ice axes. When you’re in the right place, get ready to fight the final boss of the Shadow of the Tomb Raider game.
After the cutscene ends, go to the altars and destroy them. We deal with the extent until we destroy the last luminous part – after that, another video will start. Now you will be attacked by Amara, whom it is best to fight with using firearms in the Shadow of the Tomb Raider game. You don’t have to worry about supplies, there are quite a few of them scattered in this area.
In (Shadow of the Tomb Raider) To defeat Amara, repeat the same movement cycle five times:
- Attack on Amar until he hides behind the energy dome;
- Approaching the enemy close and pressing the F button;
- We deal with the sectarians running at us.
It is best to pay attention first to ordinary enemies, and then move to the battle with the main boss. In battle, do not forget to use rolls, as hitting you with a luminous sword or arrows from a ritual bow will lead to a tragic ending.
Shadow of the Tomb Raider when you remove enough health from Amaru, he will begin to teleport. The main thing here is not to confuse this moment with a simple attack since the visual effect will be similar. After each use of the teleport, the boss will be behind Lara’s back, so here just use the same rolls and make sure that after that the enemy stays in place.
Then repeat the already known cycle until you overcome it. When the battle is over, you will find a very lengthy video that completes the passage of the story mission in the game Shadow of the Tomb Raider.


Leave a Reply