

As with any RPG, side quests in Cyberpunk 2077 has enough main storyline quests as well as side quests. In this material, you can read the walkthrough of absolutely all secondary activities.
Side Quests in Cyberpunk 2077 Digital Bonus
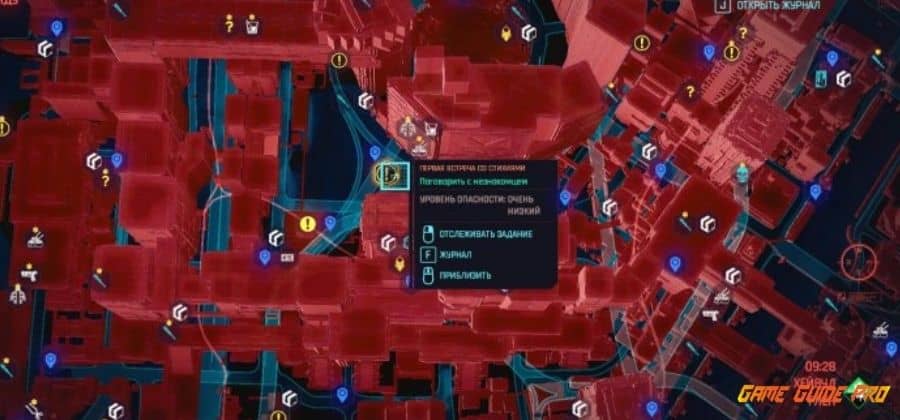
After T-Bug has talked to you, go to the next runner, talk to the NPC and ask him to show all the available scripts. Select the one marked with an exclamation mark, install it in “side quests in Cyberpunk 2077” and scan the room. Send a “Request” to find out which terminal you need to hack, and this will end the quest.
To each his own “Lexington”
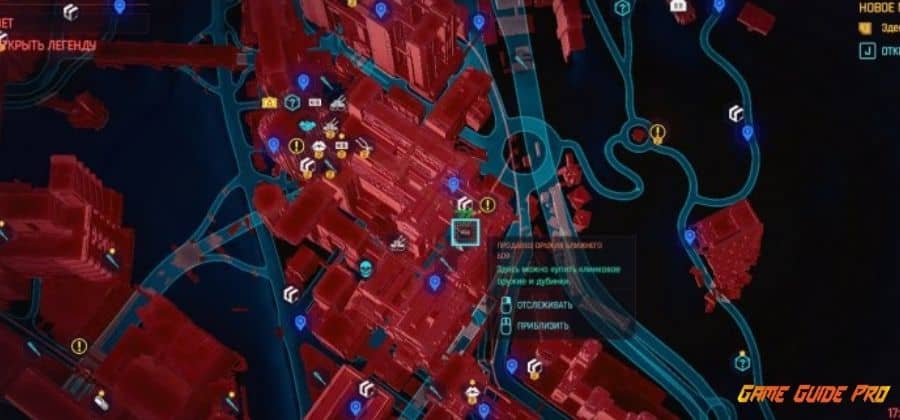
Go to the NPC marked on the map, chat with him and pick up a free weapon marked with an exclamation mark.Blood and bone
The full walkthrough is described here.
Anatomy of a Murder
Go to the points on the map, where battles with regular psychos are waiting for you. A total of 17 battles await you, for victories in which Regina will give corresponding awards.
With interest
Pay with Victor for the implants installed at the beginning of the game.
Where is my car, Shumba?
After you get to the 2nd story act, go down to the 2nd floor of the parking lot and get into your car. Wait for a taxi to ram you, then proceed to the next quest.
Compensation
We move to the office “Delamain”, where we need to talk to the AI. Call the system an insured event to receive compensation for the accident.
Reintegration
Speak with Delamaine in the workshop. Take the scanner from the table, then leave the office and explore the city. Return some of the Maddened Vehicles to receive a reward.
All Side Quests in Cyberpunk 2077 is Good Rewarded
Go to the shop of Cassius Ryder marked on the map to pick up the free “Ballistic Coprocessor” and “Mark of the Tiger’s Claws” implants (available in the “Palms” section).
The aim, fire!
After calling Wilson, return home and proceed to his store. Chat with the character, and then go through the test in the shooting gallery. You need to score the most points within a minute to get a pistol from Wilson as a reward.
See you in the afterlife
You can take the quest by calling Mama Wells. Go to the bar and chat with the NPC, then go to Jackie’s garage and use the scanner on the spot. Having found all the interactive objects for interaction, take the key and proceed to the second room.
Take a few more items on the table and think about what you can bring as a tribute to the memory of your friend. After attending the farewell ceremony, chat with those present and again contact Mama Wells, who is already ready to give you the keys to Jackie’s cool motorcycle.
Easy Money
Warning: The level of opponents is high enough, the task cannot be completed at the start.
After Kirk speaks to you at the bar, go to the meeting point marked on the map. Having eliminated five opponents, deal with the reinforcements and return to the quest giver for a reward.
For a more detailed walkthrough of the assignment, read here.
Role played
We rise to the roof, where Misty and Victor are, we examine the graffiti on the balcony. When you get your message, go to the Know Tell Motel, go up to the 3rd floor and proceed to Room 210. After talking with Lizzie Wizzy, head to Ryot when the sun is over the horizon.
Chat with the guard (here you can either persuade him, if you started the game as a child of the streets, or break in, pumping the strength up to 11 units), and then move to the 2nd floor. Head to the door marked STAFF ONLY, call the elevator, and head to the VIP area. Hear what Lizzie and Liam are talking about, copy the terminal recording and report it to your customer.
When Lizzie asks you to meet, return to room 210. Interact with the body and dispose of it by throwing it into the trash can on the 2nd floor.
Knight City Jester
Find 20 graffiti on the walls of Knight City.
Riders of the storm
Go to Panam in the wasteland, talk to the girl and then follow to the abandoned factory. Once inside, talk to the driver and proceed along the path that seems reasonable to you.
Having found the entrance to the basement, we free Soul, after which we deal with several enemies. Get rid of your pursuers, reach the endpoint and wait for the storm to begin. We find the switch, check the fuse, and communicate with Panam. Wait until morning, pick up the rifle from the motorcycle and complete the mission.
Don’t call Soul
After closing the previous quest, move to the wasteland and chat with Panam. Move with the girl to the railway station, climb the tower and find a punched card there (located in one of the boxes). Insert the item into the terminal, chat with Panam, and head to the veterans. After waiting for the morning, deal with the convoy, assign the technique and return to Panam.
Taming the Basilisk
Important: After completing this Side Quests in Cyberpunk 2077, you will unlock several additional endings to the plot.
After leaving the camp, you need to spend a day somewhere in the city. After that Panam will again invite you from the wasteland to experience the “Basilisk”. Go through it and, if you want, allow Panamas to touch you to start an intimate scene with a girl.
Street justice
Go to the meeting with Wakaka and wait for the client at the outlet. Once in the car, talk to Bill, and then go for the police patrol. Wait until the cops shoot Wakaku to open access to the next quest (if you help him, you just get 5000 Eurodollars).
The sign of Jonah
If you did not save the customer in the last assignment, you have to follow Joshua and talk to the sister of the deceased. When her mother returns, leave the location and, getting into the car, head to the cafe. I recommend not to settle for money but to continue the quest.
With the “Oh no” option, go to the cafe and sit next to Joshua. Ask about Vasquez, script and braindance.
Secret materials
Look at the warehouse in the center of Watson, pick up the module that Wakaki needs. Call Sandra on the phone, then follow the coordinates to the girl.
Two comrades
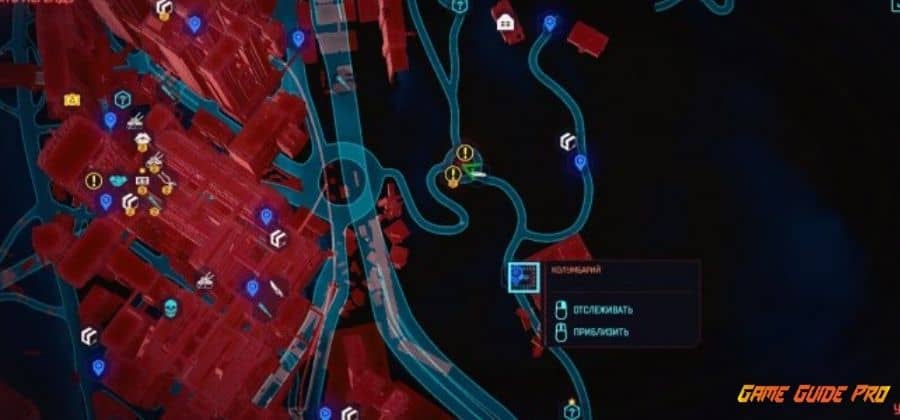
Here you should explore the atrium of Magabash H10, having talked to a couple of cops who are standing next to room 0613. Promise to help them, then knock on the door and tell the owner that you sympathize with him. After going inside, talk to the NPC, and after completing the conversation, leave the building and go to the columbarium. Explore the niche walls to find the one with “Andrew” written on it.
Now you need to go back to the cops and tell them the results.
Chain Reaction
Move to Judy’s apartment, follow her to the bathroom. After learning that Evelyn committed suicide, take her body to the bedroom and leave the room. Talk to Judy on the roof, then leave her alone.
Puppet Passions
After completing the “Chain Reaction”, head to the “Clouds” club to the desired marker. Wait for Judy, then go to Maiko with her. Before leaving, the girl will tell you the NPC you need, after which you need to go down to the technical floor and deal with him. After completing all the cases, leave the location.
Conversations about the Revolution
You need to visit Judy’s apartment again, where Roxanne and Tom are waiting for you. When Maiko appears, you will chat about the attack on The Clouds. To close the quest, you must either stay with Judy until morning or leave the premises.
Palace Coup
Side Quests in Cyberpunk 2077,After completing the previous mission, Judy will call you, after which you need to come to the mega tower. Wait for a little at the entrance, look inside, and say you’re ready to get to Hiromi. Climb the tech floor, eliminate the enemies, and head to the roof using the freight elevator. Once in your room, chat with Maiko and choose one of the options.
Important: If you decide to kill Maiko, it will worsen your relationship with Judy.
Let me go, Depth
Meet with Judy at the marker. Wearing a wetsuit, dive with the girl and follow her into the flooded city. After examining the things that come across to you on the way, move on to the church. Having found the gap, talk to your companion, and then watch the cut-scene.
When you wake up on the beach, you can continue your conversation with Judy. If you haven’t ruined your relationship with her, you will have access to a romantic scene with an NPC (how to achieve this, read my article ).
In the footsteps of the past
Important: this quest will become available only after the passage of the story mission “Passenger”.
Read the full walkthrough of the quest here.
Old Lady
After talking with Johnny, jump in the car and give the Bestia a lift to the cinema. Read the letter on the console and dial 0000, then go up to the projector and interact with it.
Chat with Bestia. Here you need to choose one of the options: “kiss” the girl or say that you “have nothing special to offer.” Choosing the second, you will get access to additional quests from Johnny Silverhand.
Surprise
After talking with Johnny, head to Kerry’s house. Climb over the fence to find yourself in the mansion, look around and tell Johnny that Kenny is in the bathroom. Use Misty’s tablets and chat with the owner, then look into the phone. There, find Nancy’s contact and contact her to close this Side Quests in Cyberpunk 2077.
New Turn
After completing the “Surprise” Side Quests in Cyberpunk 2077, move to the point marked on the map. Go up to the 3rd floor where Nancy is waiting for you. Use force or act stealthily, after which you will need to get files and leave the building.
When you find yourself in the car, sit behind the wheel and go to the next point. Dial Kerry and select one of the musicians, and then proceed to the next task.
Sounds of music
Now you need to go to the “Red Mud” bar, where you will need to transfer control of Johnny’s body again. Play on stage with former colleagues of
Silverhand to complete the quest and receive a cool reward.
Sturm und Drang
After completing the “Sound of Music” task, you need to answer Kerry’s call. After talking with him, the player needs to intimidate the musicians and get rid of the equipment that is in the car.
This can be done with several grenades. Next, you need to break away from the police chase, drop Kerry, get to the bar, and get the due reward.
Star Factory
After completing the previous Side Quests in Cyberpunk 2077, you will soon be contacted by Kerry again. According to the terms of the new mission, you need to enter the club with a friend before the musicians arrive.
This can be done in several different ways:
- Look around the corner where two fans are chatting. Look at the stairs to see the retractable arm – shoot at it to take advantage of this design.
- Talk to the NPC who is waiting at the very end of the line – he can sell you a ticket (the usual price is 21,000 Eurodollars, if you threaten him, the fan will drop the price tag to 10,000).
- In another corner (to the right of the fan selling tickets), you can find a passage to the elevator, which will take you directly to the VIP zone.
Once inside the building, get rid of the enemy guarding the passage to the desired sector (defeat him by force or steal a pass from one of the workers). Behind the scenes, you need to go to the dressing room and chat with the girls. Persuade Kerry not to be nervous, so you will continue with this Side Quests in Cyberpunk 2077 chain.
Shadows Wander
Having arrived at the desired point, talk to the security and inform them that Kerry sent you. After meeting a friend, chat with a reporter and meet Kerry’s colleague by walking out onto the balcony. Next, you can respond to Kerry’s feelings, which will open access to the continuation of the Side Quests in Cyberpunk 2077chain.
The Big Bang Theory
After another call from Kerry, you need to come to the port and climb aboard the yacht. When the ship stops, Kerry will offer you to act in several different ways: help him, ruin the picture, or break a few things.
Regardless of your choice, the musician will burn the yacht, on which your mission will end.
Guardians of Disorder
The full walkthrough of the Side Quests in Cyberpunk 2077 is available here.
Hunter hunt
Having completed the previous quest, you will be contacted by River, who will ask you to deal with one kidnapping.
After talking with the NPC, take a look at the lab and the filing cabinet. You will talk with the arrived assistant Rivera, and then examine the room of the son of Joss. In the room you need to find:
- posters;
- a computer;
- gramophone;
- drugs;
- locked box.
If your intellect is pumped up to 12, then feel free to go to the next stage, and if not, then look through all the recordings of the maniac’s dreams (the clue is the track that you can listen to on the gramophone in the next room).
Go to the terminal in the “Files” tab, the deleted data will be found on the guy’s computer. Now you need to follow River to the trailer by asking the mother about her life.
The next day, when River wakes you up, look at the notes and look for segments at the time intervals 01: 17-01: 21 and 01: 22-01: 25. On the second entry, you need to find a cow, segment 00: 06-00: 16, Anthony Harris’s father, moments 00: 54-01: 01, 01: 01-01: 06, and 02:01.
On the third entry, you should be interested in the following points:
- Solar battery [00:22 – 00:27];
- Wall clock [00:29 – 00:33];
- Details of the electrical appliance [00:33 – 00:45];
- Fuel barrels [00:33 – 00:45];
- The sound of a garbage truck in the skylight [00:35 – 00:46];
- Victims [at different times];
- Fire certificate [00:45 – 00:58];
- Computer [00:45 – 00:54];
- Two pumps [00:58 – 01:06];
- Number labeled “Petrochema” [01:00 – 01:08];
- Light towers outside the farm [01:12 – 01:19].
When you find enough evidence, River will take you to the farm, where you need to act as carefully as possible. Going around mines and turrets, get to the barn, examine the victims and help the former detective free Randy.
Boy with a Pistol
After closing the previous quest, move to Joss’s house and help Rivera with the preparation of dinner. Talk to him and take part in the competition. At the end of the quest, you will have a conversation with the detective at the water tower, where you, if you have chosen the female version of V, will be able to romance River.
Bunraku
Head to the penthouse where the Perales couple will be waiting for you. They will ask you to find out who snuck into the room last night.
Read the detailed walkthrough of Side Quests in Cyberpunk 2077 here.
Explosive Nature
After calling Ozob, take transport and go to the meeting point. After picking up the client, take him to the marker, wait for his return, and get rid of the pursuers.
Network Magic
The full walkthrough of Side Quests in Cyberpunk 2077of the quest is available here.
Who is not with us
The quest is taken to a merchant in Santo Domingo. After ordering a drink, listen to his conversation, after which the NPC will ask you to deal with the bandits.
Oil on Fire
Continue your walk around Santo Domingo until one black NPC contacts you. The man will say that he knows you, and you need to ask him about what is happening here. Having entered the territory of the plant, talk to the Scavengers, choosing one of the options: intimidate (you need 20 strength) or kill and pick up their goods.
The Path of the Righteous
After leaving the factory, take a look around and look into the eatery nearby. Order any drink and then wait until you are attacked. Choose one of the options:
- give them money;
- use the option if you followed the “Street Child” path;
- use power if it is pumped to 20.
Etude in Pink Tones
After looking into the bar where you said goodbye to Jackie, deal with a couple of enemies. Agree to follow Pepe’s wife and move to the next street, then follow the lady in pink. Watch her from a distance, then go into the building and go up to the 2nd floor. When you’re done eavesdropping on the girl’s conversation, call Pepe and tell him that his wife loves him in Side Quests in Cyberpunk 2077.
Dark Lane
Make your way to the Arasaki Tower. In one of the alleys at the entrance to the complex, find a corporation that is being beaten by two patrolmen. Talk to the cops and ask them to give the unfortunate one to you for reprisal, after which you will have a talk with Nigel. Using several options, get money from him and close this Side Quests in Cyberpunk 2077.
How to Get a Star from the Sky
If you were able to convince Kerry not to swear with the girls in one of the previous quests, then one of the Us Cracks will contact you. Agree to come to the right place, meet there with Blue Moon and make sure that no one attacks her.
I advise you to immediately go to the bridge since this is where the attack will happen. Try not to kill the enemy, but to render harmless, so that you will be credited with completing the mission.
Enjoyment Guarantee
Not far from Subway Farrier Street in Little China, talk to the man who asks for help. Take him to the clinic to receive your reward in Side Quests in Cyberpunk 2077.
Transcendental Experience
Get to the fast travel point Market: Sakura Blossom, then find the Brandance merchant on the left by the stairs. Agree to an inspection with the NPC equipment, go to the indicated building and activate the player.
After a while, you will wake up completely naked, surrounded by the Scavengers. Acting covertly, return your belongings by examining the second room on the right side (your items are in the cabinet by the window). When you finish the showdown with the Scavengers, return to the merchant and decide his fate, having received generous compensation.
Red prophet
The full walkthrough of the quest is available here.
Queen of the freeways
Like the previous quest, this mission consists of several stages.
First, you need to take part in the racing competition by activating the activity in the “Postmortem” club. Chat with the bartender Claire, who will call you a little later and invite you to her garage (before that, you will need to complete the “Red Prophet” mission).
Listen to the girl and agree to become her pilot. Go to the City Center, sit on a bench, and wait for a little for your companion. Call Claire before the race and decide on whose car you will compete in. To advance further, you need to win the race.
After fulfilling the requirement, wait a day after the end of the race. Claire will contact you again, offering to visit her in the wasteland. Come to the place, sit on the bench and call the NPC – you again need to come to the finish line first.
If all goes well, head to Claire’s garage in Santo Domingo to take part in the final race. Before you start, you will have a conversation with a girl who will tell you about her life. If you agree to help her, Claire will give you her car as a reward, and if you refuse and just win the race, you will get experience and money, as well as a pass to the next Side Quests in Cyberpunk 2077.
The boss is dead, long live the boss
After completing the Queen of the Highways mission, inspect the roof of one of the buildings in the Rancho Coronado area. You need to talk to one of the Sixth Street gang, who will offer to take part in the tests. Take the pistol from the rack and move to the marked point. After drinking alcohol, shoot at targets and get a well-deserved reward of Side Quests in Cyberpunk 2077.
Sacred and secular
The quest is taken from the monk who is waiting for you in the north of the Northside near the Doki fast travel point. After finishing your conversation with him, inspect the warehouse and fight with representatives of Maelstrom. Free the brother of the monk to complete the Side Quests in Cyberpunk 2077.
Note: for completing this quest, you will not receive a reward, but you can find several interesting things when examining the warehouse.
Meeting with the elements
You need to meet a monk 4 times and pay him for meditation. The NPC is located at the following points:
Glen District, Arasaka Tower Park
Japan Town, near Redwood Market
North Oak, next to the columbarium
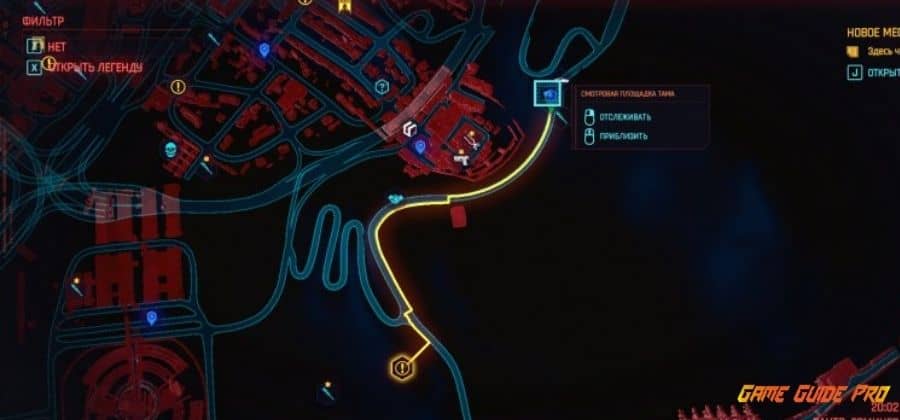
Rancho Coronado, near Tama Observation Deck
You Can Also Check : Cyberpunk 2077: How To Complete The Red Prophet Quest.


Leave a Reply