

Complete Syberia 3 Walkthrough:
Syberia 3 Walkthrough: Even though the game itself Syberia 3 was released a long time ago, it still has a lot of fans among the gaming community. Therefore, I decided to remind you of this wonderful quest by compiling its full walkthrough for you.
Enjoy reading Syberia 3 Walkthrough!
 Location: Hospital (Syberia 3 Walkthrough)
At the start of Syberia 3 Walkthrough, The passage of the game begins with a visit to the hospital, in which Kate finds herself after being helped by residents. After talking with the guy in the hospital bed, leave the room and move to the door on the left side of the screen. In-game Syberia 3 After examining the door and the red button next to it, move the mouse cursor in observer mode to the diagram on the box with the button.
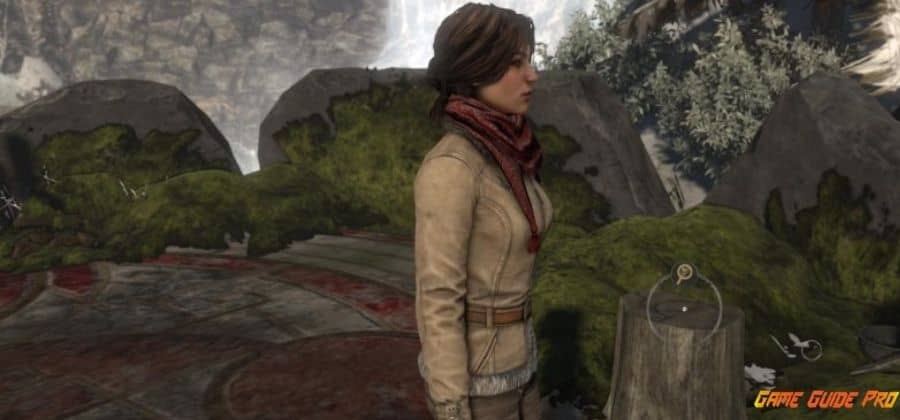
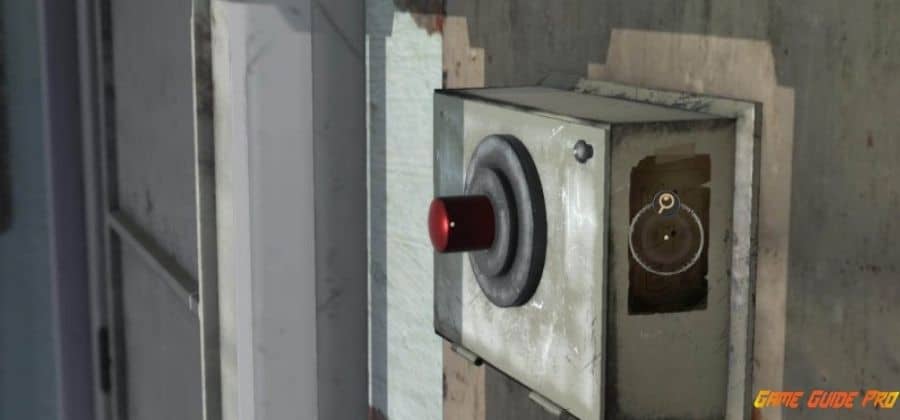 To fix the call, you need to find a tool. Turn around and go to the table where there is a bowl of soup. Take the knife, go to the bell and open the screen, select the knife and click on the bolt. Hold down the left mouse button and move the cursor counterclockwise. When the box opens, click on the green wire and drag it to the top connector, then lower the cylindrical object with wires down the container.
By clicking on the button, you can now leave this location in Syberia 3.
Where can I find a doctor’s office?
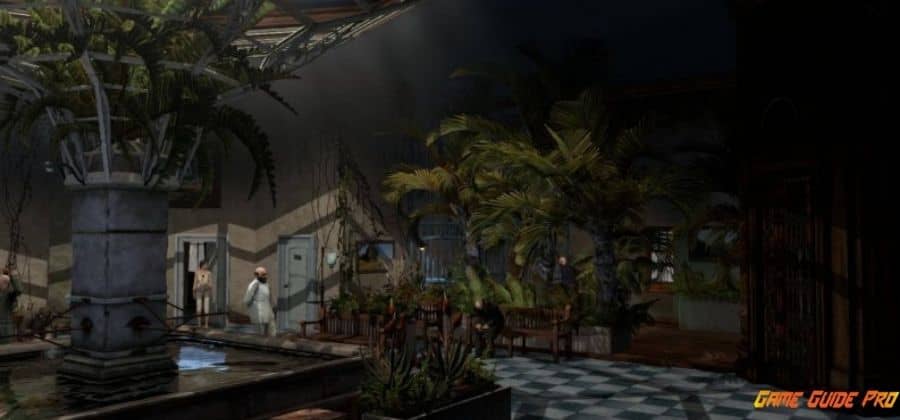 Now Kate needs to find the head doctor’s office.
Move to the opposite part of the hall from your position, where the desired door will be found. Once inside, watch the cut-scene, and then answer the questions of a specialist.
Hint: first choose the truth, then the truth again, after the half-truth, and then the truth again (this way you will get the best result).
When you convince the doctor that there is no point in keeping your heroine in the hospital, he will allow you to leave. Take your things and leave the floor.
How to get out of the hospital in Syberia 3?
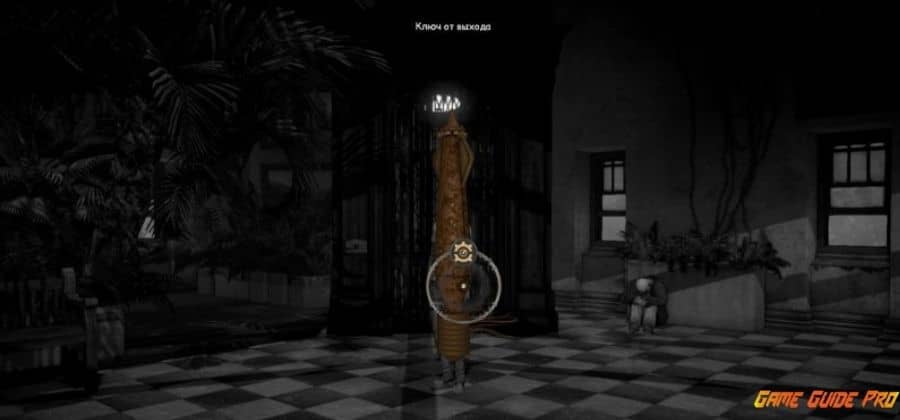
More in Syberia 3 Walkthrough, After taking Kate’s things from the locker, move to the elevator with the grate, using the key on the hole located on the side. Next, we solve the puzzle: in turn, move the cursor over the points in the center, moving the petals of the key. You need to make sure they line up with the holes.
 We return to the doctor, talk to him, and then examine the issued key more carefully. You will realize that it is missing one piece that you need to find.
Interact with the chair in the doctor’s room to access the drawer. Move the books placed there to the left until you see a red and white brochure. Scroll through the pages until you find an image of your key, on which you will find information about the missing part of the item.
We return to the room where Kate woke up, we communicate with Kurk, who will advise us to send the key to the Yukos. In a conversation with him, use the brochure, then go to the balcony and interact with the grate. Having found an owl on the tower, try to lure it, then return to the guy and talk to him again. At the end of the conversation, we go out into the corridor and move to the opposite part of it, where another grate is located. There you will see a sleeping man from whom you can steal the key.
We go to the elevator, turn left in front of him, and move deeper into the screen. In front of the window, turn left again, using the key on the door you see. Take one of the mechanical birds, and then return to Kurk and further – to the balcony to the grate. Interact with the hotspot again, as a result of which it will turn out to transfer the key to the Yukos.
When the cut-scene ends, you will need to talk to Olga Efimova and take the key from the owl. Move towards the elevator and take it down to the first floor. Now you need to find Dr. Zamyatin, who can be found nearby. Opposite the front door, go into the corridor and follow the two talking characters into the office with the door open. Talk to your doctor and also interact with the yukos book from the documents section of your inventory.
After that, we again move to Efimova.
Also Check: Layers of Fear Walkthrough
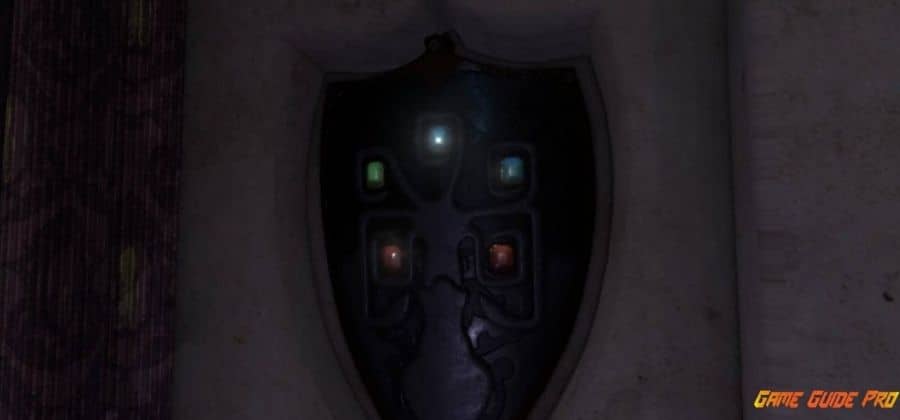
Not finding the woman in place, look around the room and approach the wall to the right. Pull the lever, watching as a strange shield with multi-colored stones appears in front of you. Next, you need to examine the sword, which is held in the hands of a knight standing nearby. The weapon has rotating rings that need to be positioned so that you get the picture from the picture:
 After that, the knight will tell you the correct combination of stones:(Syberia 3)
 Move to the elevator and go down below, and then watch the cut-scene. Upon completion, you will be able to leave the hospital using the boat.
However, first, you need to pick up the canister to the left of it, then go right across the bridge. After examining the door, not far from it, find the blue barrel, using it on the canister. Then we just return to the boat, use the chain canister and enjoy the cut-scene.
Location: Yukol Camp (Syberia 3 Walkthrough)
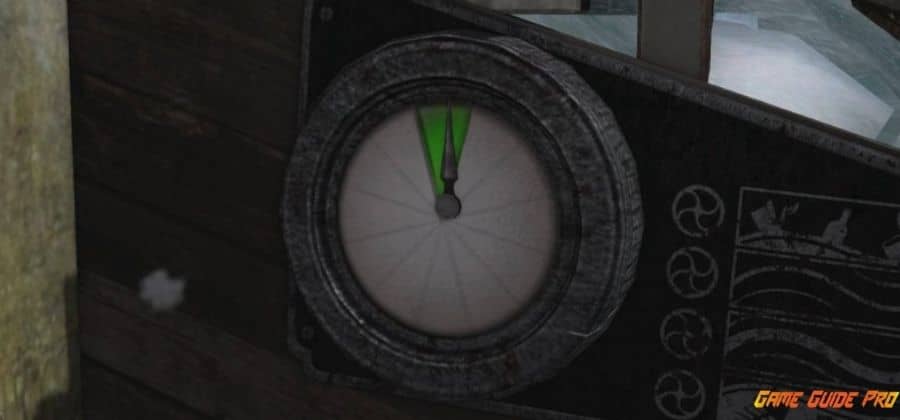
Also on Syberia 3 Walkthrough, When you find yourself in a new location, talk to a representative of these people and go from him to the right side – to the man standing next to the ostrich. Now we need to go through the forest to the dam and interact with the compass so that the arrow is in the green area.
This can be achieved in the following way:
- Turn the top valve counterclockwise to the very end.
- The bottom valve must be turned counterclockwise as far as it will go.
- The second valve from the bottom must be turned clockwise as far as it will go.
- Turn the second valve from the top clockwise, but not to the very end.
 After watching the cut-scene, we proceed to the second stage of the passage of the location.
Where can I get a pass in the Yukol camp?
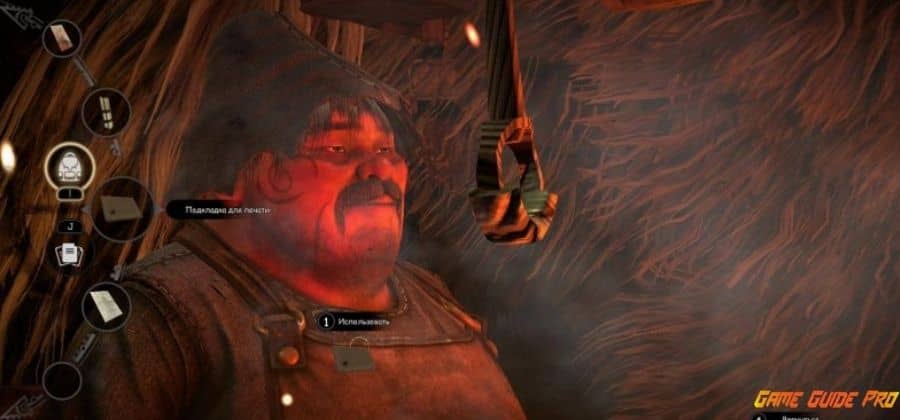
Returning, go to the tent, which is a small market. Move to the far corner, where you can find the habitat of the shaman Ayavaska (the landmark is the animal’s skull hanging over the passage). Chat with him and find out that you need a pass to get out of the camp.
Now go to the main hall in the market, and then turn right to find another exit from the tent. After leaving the canopy, turn left and go to the policeman, who will also need a pass to move to the next part of the location. Now you need to walk to the wooden hut located on the right after examining the table and printing press. We take away the sponge located on the stand to your left, move the levers and take the stand itself.
More on Syberia 3 Walkthrough, The next step is to repair the machine, for which you will need to soak a sponge in ink and also find a seal. Take a sample of the drawing and take it to the blacksmith, then return to the market and go to the yurt (it will be the only one here that you can visit). Interacting with the stairs, go inside, examine the wooden box, and drag items until you find candles.
 They are required by the blacksmith as a source of wax. Now we go down and go to the left – again to the blacksmith. After talking with him, we give back the lining and candles, receiving in return the finished seal of Valsembor. Now it remains for us to find the pass form and we can move on.
Walkthrough the bazaar and move closer to the first aisle. Find a vegetable merchant who will give you a blank pass after the conversation ends.
 Next, we go to the printing press in the hut and raise the lever until it stops. Now we need to do the following manipulations:
- we return the seal stand to its rightful place;
- on top of the stand we place an empty pass, securing it with clamps on the sides;
- insert the seal into the sleeve, lower the small lever (you need to make it so that it is horizontal);
- we return the sponge soaked in ink (you can get it by returning to the market, but turn right without going inside. Move to the shore until you find a cuttlefish, to which you need to apply a sponge);
- slide the stand to the right until it is under the seal.
- After completing all the steps, lower the large lever by dipping the seal into the ink. Raise the lever, move the stand to the side and lower the shaft again to put the seal. After watching the cut-scene, select the trick option, after which you can control Kate again.
Moreover, on Syberia 3 Walkthrough: Your goal is to free yourself as soon as possible. Use the bottle slightly off to the side of you, pushing the cabinet. After that, knock the lamp off the table and get shards, with which you can cut off the plastic handcuffs. Move outside and, showing the received pass to the policeman, leave the Yukol camp.
Location: Valsembore (Syberia 3 Walkthrough)
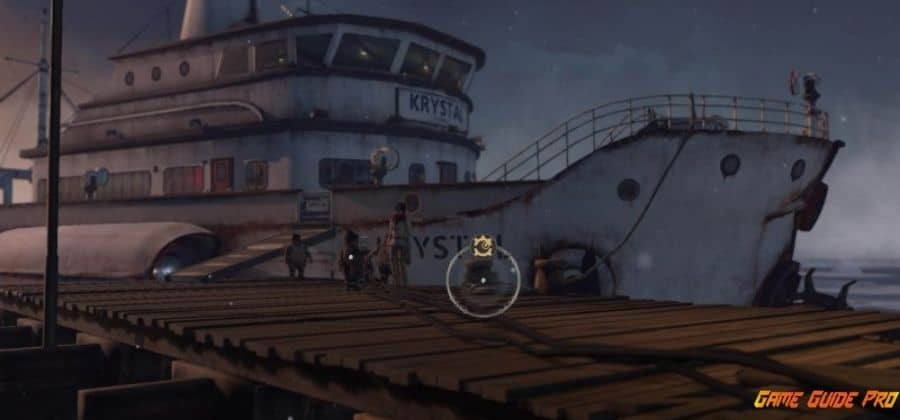
Also on Syberia 3 Walkthrough, When you see the stern of the ship, go around it on the right side and talk to Captain Obo.
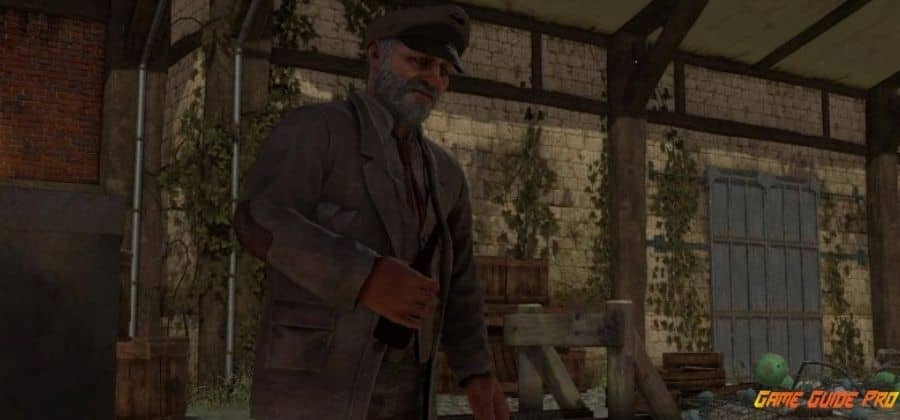 Continuing on your way, walk past the sleeping man and look into the tavern, where you need to talk to the waitress – the watchmaker’s daughter. After finishing the conversation, leave the establishment and move to the right side. Then turn left and head further to the watchmaker’s shop.
Once inside, talk to the man until he gets sick. Turn right and take an empty cup from the shelf, then go downstairs and examine the basement. Take the denture off the table, take a quick look at it, and then read the note on the wall that says the watchmaker should drink his medicine every day 3 hours before dinner.
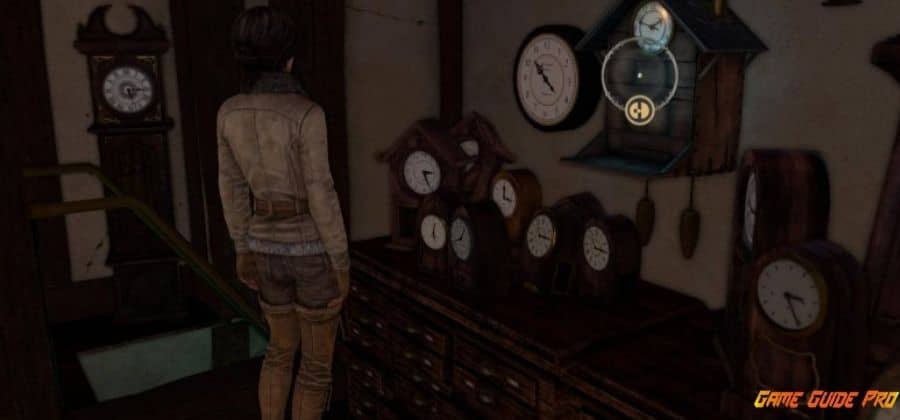 We rise and approach the table with the clock, located on the right side of the stairs. Interact with the cuckoo clock, put the cap on the shelf. Set the time to 5:00, which will fill the container with the medicine, and then give it to the shop owner. When he gets better, continue the conversation, and then go down to the basement, and then again to the watchmaker.
Also, we noticed on Syberia 3 Walkthrough; You need to find a video of Baranur, for which you need to search the cardboard box located next to the stairs leading up. When you find a Babin, install it in the player to view the entire recording.
We go to Sarah and further to the tavern, where at one of the tables we will need to find the not-quite sober captain Obo. First talk to him, and then to the bartender, then again to Obo. We are waiting for a special cocktail to be served to him, and we talk to him again, convincing the captain that he is obliged to help us solve the problem with the transfer of yukos. In the end, he agrees, after which we move on to the next part of the quest.
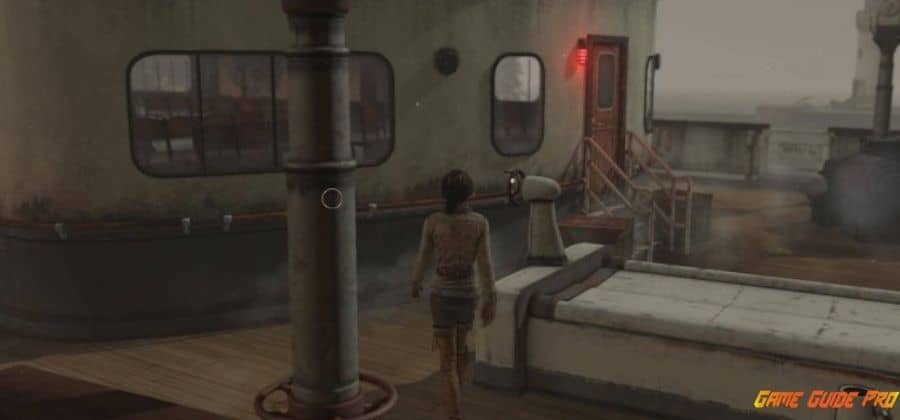
Heading to the place where you first met Obo. There we need to find a passage to the ferry, passing through the side door, we rise to the very top. Chat with the captain to find out that we need to find coal for the ferry to sail. Along with this, you will know the code combination – 0509.
Where can I find coal for the ferry in Syberia 3?
 Now we go downstairs, we find the valve that allows you to penetrate the bunker. Having twisted it, we leave the ship and head to the gate opposite, where we need to enter this code. When you go inside, move the cart and pull the lever.
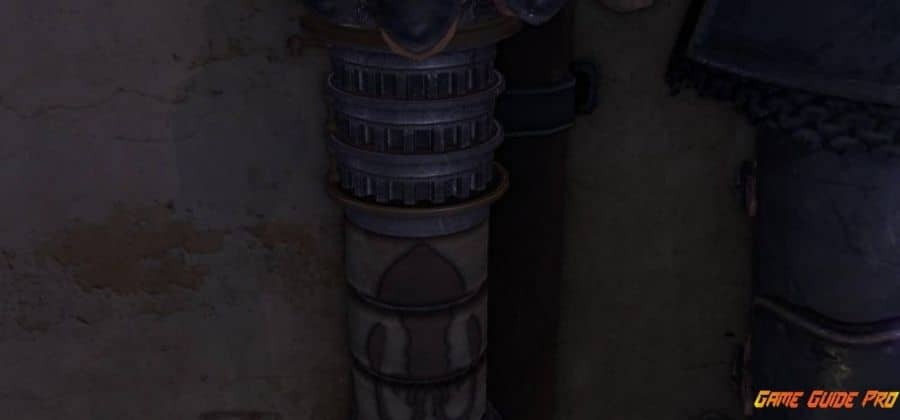
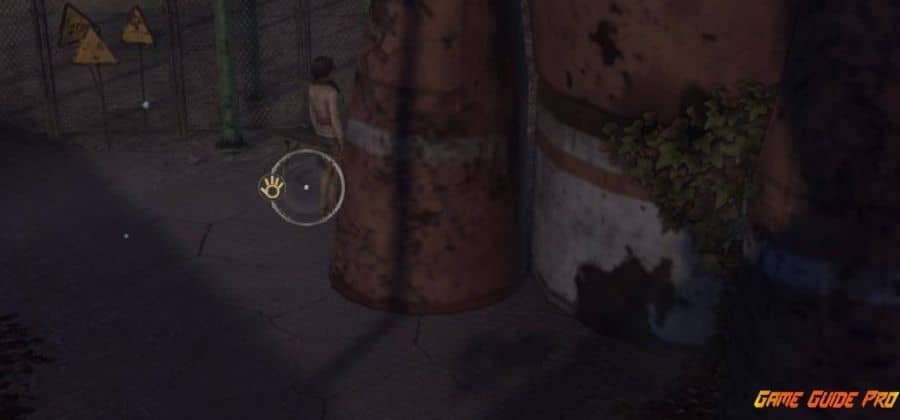
The next step is to search for a gutter inside the fenced area. Find a nearby metal pipe supporting the box and knock it on the green pipes. One of them will emit a dull sound, which makes it clear that there is coal inside, and now you need to interact with it by clicking on the magnifying glass and applying the chute. Press the button and watch the coal roll into the minicar.
When the procedure is completed, move away from the cart and inspect the strange transport, standing nearby. Using a knife, pry out the upper left green button to be installed in the lower right compartment.
After completing the cut-scene, move to the crane and find the panel, enter the code 0509 again. Climb to the top of the crane and interact with the monitor by switching images. Now you need to rotate the arrow so that it is above the minecart filled with coal. Click on the top black button and wait for the crane to grab the minecart. After that, move the crane all the way forward, and then manipulate the levers on the sides to move the crane closer to the ferry – right above the open bunker.
Where can I find water in Syberia 3?
Now we need to resolve the issue with water.
Near the hopper, you need to find a hose, use the lever and move the hose to the hole. After that, press the lever again and go downstairs to the water tank. Turn the valve to pour the liquid onto the steam, after which you can return to the captain.
He will inform you that he lost the key, and now you need to make a new one.
Where can I find the ferry key in Syberia 3?
More on Syberia 3 Walkthrough, Visit the watchmaker’s workshop, talk to Sarah, and inspect the mini ferry in the basement. Use the handle the girl gave you on the hole on the side of the breadboard and remove the protective grill. Turn on the light and study the information on the plate. Several key combinations will become known to you (80 robots, 30 years old, 60 meters) after which we set these numbers on a device located nearby. If you did everything right, then the anchor will lower, and if you made a mistake, then it will rise. The sequence of numbers should be as follows: 30> 80> 60> 90.
When the anchor is fully lowered, pull on it and grab the key model, which you now need to make a full-size duplicate of. Go to the device on the table on the left, open the first compartment and put the blank there, and lower the key model into the box. Pull down the toggle switch to hold down the key and set the percentage to 200. Click on the button and create a key.
Now go back to Obo and use the key on the hole. Next, we need to obtain permission to sail from the mayor of the city, who is located on the square with the protesters (it is located behind the sentry’s workshop up the stairs). After finding the mayor, talk to him about yukos, showing respect (flatter, but do not press), until the official gives the go-ahead to open the locks.
Return to the captain and tell him that the locks need to be opened manually. We return to the place where you first appeared, and now we go around the stern of the ship on the left side. We go forward until we see Obo, go inside the barn and take a diving suit with cylinders. Examine the device on the left side, turn the toggle switch to 180 bar and press the green button. On the right side of the device, you need to install the cylinders and fill them using the red toggle switches.
At last on Syberia 3 Walkthrough, When everything is ready, go to the part of the room with the active zone and enjoy the completion of this stage of the game.
Location: Castles, Trigger, and the monster on the ship (Syberia 3 Walkthrough)
In the sequel to Syberia 3, Keith dives into the water after donning her diving suit. When you see the locks, stop near the first one on the right and pick up the gear from the ground, and a little further away – the square key.
When you take things, move to the right until you find the second lock. After inserting the key into the appropriate hole, turn it clockwise and turn the valve in the discovered mechanism. You need to turn it counterclockwise until it stops, then lower the lever, and then go back a little.
Turning left, go out of the port waters to find a sunken ship. Inside you can find a chain, after which you need to go back to the locks. Pick up two gears from the floor and install the largest in the upper left slot, the regular gear in the right, and the stepped element in the lower. Having found the point of interaction on the right, aim the chain at it and turn the valve until it stops, scrolling clockwise.
We lower the lever, and now both port locks will be open.
Trigger in Syberia 3
 After finishing your conversation with Odo, head to the shaman, and after her – to Sarah and then go to Steiner’s workshop. Walk past to the right until you see a staircase upstairs and a railing nearby. After passing through the open door (it was previously locked), we find three wedges.
Now we go up the stairs and head to the funicular house. Examine the locked door at the bottom, where we need to use the wedges we found earlier:
- Insert small and large under the door on the right side.
- Pull out the shallow wedge and move it under the left side of the door.
- Place a large wedge next to it.
- Take out the small one and use it on top of the large wedge located on the right side of the door.
While Syberia 3 Walkthrough we noticed, If you did everything correctly, the door will fall and you can go inside. Roll to the left, find a shield on the wall, and open it using a knife. We lower the switch, call the funicular, and head towards it. We interact with the panel to set the mechanisms in motion.
Now that you’ve returned to the hospital, head to the main entrance and find soldiers blocking the path. Go around the helicopter standing nearby, climb into the cabin and take the radio in the box. Back at the entrance, use the walkie-talkie on the colonel to distract him.
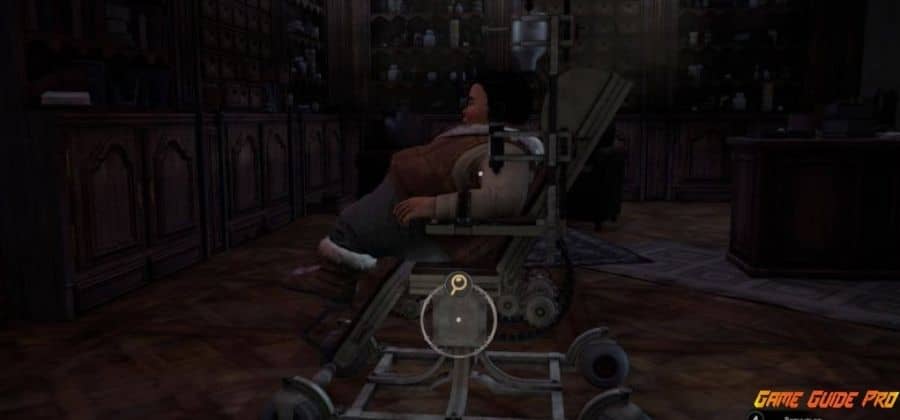
After that, head into the corridor towards Zamyatin’s office. When you are near, he will call you, and after the end of the conversation with Steiner, return to the corridor. Now we go to Olga Efimova in her office, where you will find Kurka. Examine the chair and find a cover on the back, pushing which a mechanism will appear in front of us.
Continue your examination of the chair and take note of the note on the left side, at the top of which you will find a paper clip. Take it and use it on the chair mechanism to make the pendulum stop.
We proceed further on Syberia 3 Walkthrough – you will find a syringe under Kurk’s left hand. We move to the left side of the room and find a statuette on the table, return to the chair and use it on the dial. After that, the Trigger will be free and you can watch the further cut-scene.
Meeting with the monster in Syberia 3
 During the movement, the ship will stumble upon ice floes, and you need to turn on the ice breakers to get further. Head down to the engine room and turn right. We find the icebreaker control panel, and now you need to perform the following activities:
- Turn the red valve until the wire connects to the gears.
- Click on the red button to activate the icebreakers.
- We lower the lever to your right down.
- We switch gears in the following order: 1, 3, 2.
We also noticed on Syberia 3 Walkthrough, You need to perform the last switches as long as the device is working. If you do everything correctly, then the mechanisms are activated, and the arrow will be in the green area.
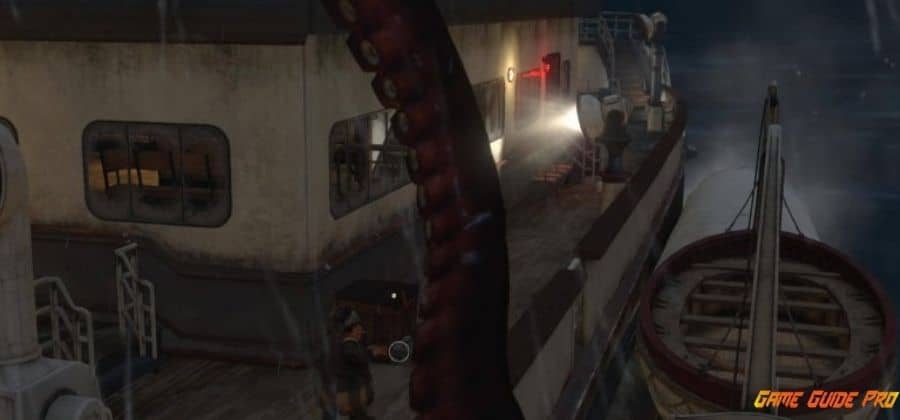
After that, a huge monster will appear in the arena. You need to smash the spotlights on the deck of the ship. There are only 6 of them, and you would be better off heading to the port side first. Move the box there closer to the first spotlight, but do not rush, as you will not be able to break it with your bare hands.
On Syberia 3 Walkthrough, Now we head to the starboard side and find a crowbar there. We return, go up to the box and break the light bulb. We pass a little further, lower it down and break it. One of the searchlights on the right side of the ship will smash the monster itself, the second you will destroy in the same way as the previous one – lower it and smash it with a crowbar. Then we go to the bow of the “Crystal”, we break another searchlight there.
Now our target is the aft searchlight, but the octopus won’t let you get close to it. To distract him, go inside the room with benches and yukos. Go down to the engine room and find a box with an emergency flashlight there. We return to the deck and use the flashlight on the searchlight to distract the monster’s attention. We break the last light bulb and enjoy the cut-scene.
When the monster returns, your new task will be the engine. To drown it, Kate will again need to go down to the engine room and go to the icebreaker control panel. On the right side, find the switch and lower it to stop the mechanisms. We return upstairs, head to the starboard side, and find the captain in the boat.
At the direction of the sailor, we return to the yukos and pick up the homemade lists scattered near the benches. When you are done, we go up to the captain’s cabin and turn left, towards the globe. Finding the books, click on the far one to find alcohol, and then we go down again to the engine room.
We go left, then down, where we find a kerosene lamp. We connect its two parts, then we use a bottle of vodka on them and fill the whole thing with alcohol. Using matches, light the fuse, and then go upstairs and chat with the captain.
We watch the cut-scene and end the passage of the current chapter.
Location: Baranur Park (Syberia 3 Walkthrough)
In this part of the Syberia 3 Walkthrough, Keith finds herself in Baranur Park, which is covered by radiation. We need to complete a few basic tasks before we move on.
What to do with radiation in Syberia 3?
First, we need to find a device to measure the level of pollution.
First, we rise to the steering wheel of the ship and take out the key from the left hole. After that, we go down the deck and move towards the bow. Further, along with the steps we go to the broken searchlight and interact with a device that measures radiation.
Having found the keyhole, use the key on it, turn the lever 90 degrees and take out the glasses. Now that you are convinced that the park is safe, but get the “Crystal” out of the water, moving on to the next storyline.
How to return electricity to Baranur in Syberia 3?
When you leave the ship, look around and head towards the descent along the wooden planks. Move towards the main entrance to the park, but do not climb the steps, but go into the wooden structure on the left side. Here you need to find a telescopic rod, then return to the entrance to the ship and use it on the top of the pole with cables.
Also on Syberia 3 Walkthrough, we noticed you need to Chat with Buruk, then go down to the engine room and interact with the lever to the right on the wall from the remote control. When the electricity returns to the park, head to the entrance and approach the Oscar automaton. After examining the foundation, go along the metal stairs further into the park.
 Now turn right from the door to the steps. Climb along with them and pick up the note from the floor that lies next to the trolley. After examining it in your inventory, return to the main entrance and turn left there. Go through the metal door inside, examine the box on the tables nearby and pick up the gear.
Examine the map hanging on the wall to realize that the note contains information regarding the correct speed combination. Realizing this, direct Kate to the door at the back of the room. Go to the right side along the rails, turn right and inspect the two cars that you should have seen. Clicking on the connector knot will knock them over, then go to the tractor and inspect it carefully.
Also, we noticed on Syberia 3 Walkthrough you need to Pay special attention to the towing device at the rear so Kate knows it can be used to get the ship out of the water. Now discard the corrupted automaton, examine its body and pick up the key. Return to the room where you found the previously locked chest, open it with the Voralberg key, and take two tools.
We return to the shore to the Oscar automaton and fix it by interacting with the area on the robot’s chest. Use a wrench to the cross hole, turn it and slide the plate. After pulling out the broken heart, install another. After pushing back the valves, hold down the left mouse button, moving it in parallel clockwise or counterclockwise.
On Syberia 3 Walkthrough: Our task is to connect both wires to the holes on the installed heart. When this is done, use the wrench on the bolt located above the heart cover. Move it to reveal that there is a mechanism for triggering the automaton.
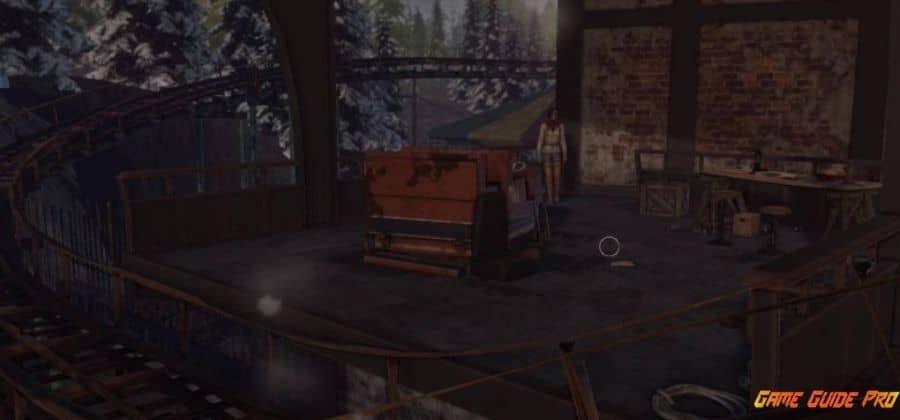
 Now you need to go back to the park, but at the entrance, Kate will see someone come on a roller coaster. Go deeper into the park and turn left for the ride with swivel chairs on the left side. There you will see a red and white rocket, next to which a metal rod is lying on the left side under the bench – take it.
Further on Syberia 3 Walkthrough, We return to the main entrance, go up the steps on the right side to the place where you found the previously crumpled note. When you see a cart on the tracks, sit in it and turn your head to the right to examine the adjacent chair. At the bottom of it there will be a second metal rod – take it.
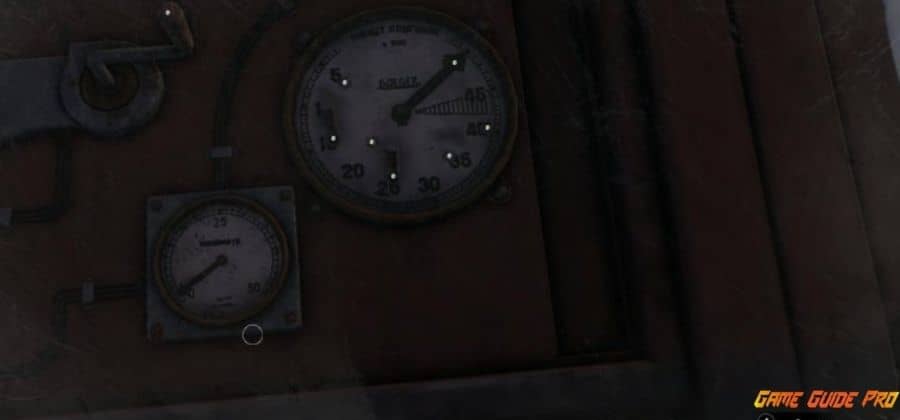 Examine the dashboard to use the calculations from the note. First, you need to twist the handle on the left side so that the arrow points to the value “50”. We set one metal rod opposite the number “25”, and the second one opposite “15”. When everything is finished, pull the lever on the right side to make the cart start to move.
After the end of the attraction, pull out the rod above the number “25” and wait for the trolley to come to a complete stop. By clicking on the active area on the left, get out of it and go down through the hole in the floor, after which – further along with the steps and along with the carriages to the one that will be open (on the right side).
Examine the photographs in the album that Kate will find at the far end of the room (see all the photos). When finished, we get out of the car and meet with Catherine, talk to her and use the knowledge gained after studying the album.
When the girl hands you the key, go back to the minecart and get the second rod. Now head to the automaton and use the key you received on it to chat with Oscar and go in search of clothes for him.
Also on Syberia 3 Walkthrough, Move deeper into the park until you see a door behind the running rides. There you will meet with Yukols, after which head to Ekaterina and talk there with the people standing in the carriage. After that – with Katya, return the key to her and ask about clothes for the automaton. The girl will give you another key, which you need to open the blue cabinet in the opposite part of the carriage.
 After Oscar puts on his clothes in the cutscene, returns to the tractor and talks to the robot again. Go to the entrance to the ferry, inspect along the way the rope with which the ship is moored to the pier. Chat with two yukos and ask them to tie the rope to the tractor, and then go to Oscar and tell him to go ahead.
After finishing the conversation, examine the towing device on the tractor and loosen the cable using the wrench on the nut. We turn the lever, we inform Oscar that he can continue to move (success will be if you have previously thrown both cars off the road).
Wait for Oscar to reach the end, and then head to the tractor and inspect the cable. Chat with Yukols so that they tie the cable to the Ferris wheel. Head towards him, go around to the side, and climb the stairs up. Now you need to install the gear you discovered earlier into the stand on the right side. If everything is done correctly, then after that the ship will be on the shore.
Finally, you need to go downstairs and head to the ferry. We pass through the building where the gear was found earlier, we leave through the basement gate to the ship. Talk to the Yukols, move to the back of the ship, and interact with the lever, which will open the hold and thus complete the passage of this game arc.
Location: Historic Center (Syberia 3 Walkthrough)
On Syberia 3 Walkthrough; Now the main character of the game Syberia 3, Keith, finds herself in a tunnel with bats. To drive them away, we need to climb the ledge on the right side of the room and go down the stairs, and then head deeper into the corridor. Go down the other steps and move to the left to the algae grate. When you reach the carpenter, talk to him and take a wooden stick from him.
Now we return to the main hall and move in the opposite direction from the tunnel to the ostriches. Take a piece of rag on the yurt, then go up the ledge to the right and go to the table next to the stairs. We take away a bottle of fuel and a flint, after which we insert a stick into the hole of the table, wind up a rag and set it on fire.
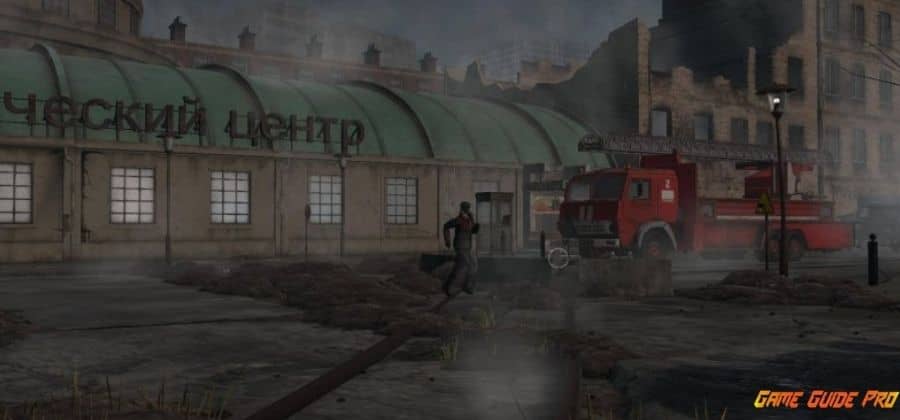
Take the created torch and move to the bats in the tunnel. When you find out that they cannot leave the room because of the bars on the windows, return to the main hall and go left. Climb the steps and talk to Oscar, after which you can now control him. Climb the steps to the street and go right until you see a red fire engine.
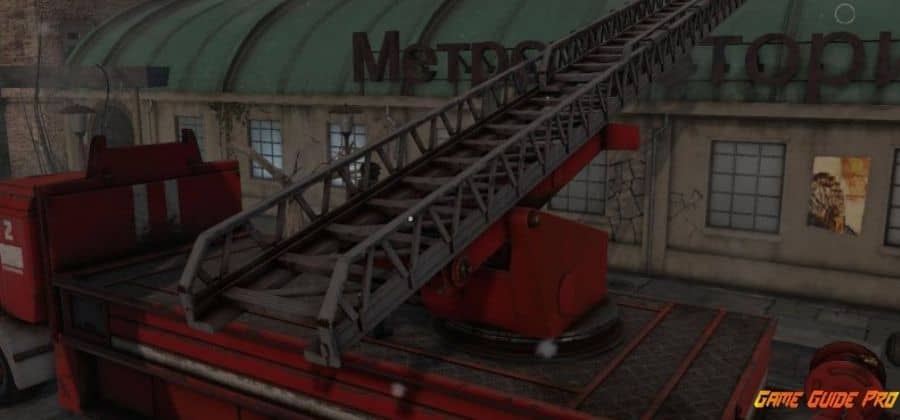
 Once behind the wheel, open the glove compartment and find the ignition key. Insert it into the hole next to the steering wheel, rotate it 90 degrees, and pull the lever on the steering wheel. Now head to the back of the car and climb the stairs. Adjust the crane boom so that Oscar can use it to climb to the roof of the building. Climb the boom to find out that you won’t be able to remove the grates from the holes with your bare hands.
Also on Syberia 3 Walkthrough, we need to go down and move to the right side to the fire engine, going a little further to a dead end. On the right side of the road, find the door to the bank, go inside and find a locksmith’s scissors on one of the tables. Now you need to return to the car, climb the ladder to the grate and cut it with scissors.
 On Syberia 3 Walkthrough, The next step is mechanical dogs Syberia 3.
After going down to the bottom of the car, remove the key from the reel with the fire hose. Now remove the plug from the cannon and rotate the hose so that it connects to the cannon. Turn the valve and click on the cannon to free yourself from the dogs.
We return to the tunnel and move to the lock. Click on the right button on the right side to start the disinfection procedure. When the iodine is over, we return to Keith’s control. The first thing you need to do is insert the seaweed into a special slot on the side of the door. Wait until the process is over, then talk to the automaton Oscar, return to the table, and light the flint.
Next comes the cut-scene and the transition to the next stage of the storyline of the game.
Location: Temple of the Red Moon (Syberia 3 Walkthrough)
On Syberia 3 Walkthrough; At the current stage, your heroine will be in the Olympia sports complex. Here you first need to go to the right side of the Yukol camp, approach the fire and talk to Ayavaska and Kurk. When you finish talking, return to the walls of the stadium, and then go to the right side until it stops until you see a slightly ajar gate.
Go through them and turn right, and then move up the stairs. Once in the corridor, turn left, go down the stairs, and again go down a little until you see the gate – go through them and move straight.
When you see a couple of wooden houses, knock on the door of the one that is intact. After completing the cutscene, talk to Dunyasha, convincing the girl to give you the diary. Without leaving far from the house, go to the left side into the depths of the cave. Find the lens inside and examine it, read the inscription on the stone slab, and take the item.
We have noticed on Syberia 3 Walkthrough; We return to the beginning to talk to Kurk again. Take the book from him, go up the escalator and turn into the left turn in the corridor with the laid red carpet. Go through the door to the room with awards, examine the box with a glass door. Use the scarf on the door, breaking it to pick up another lens.
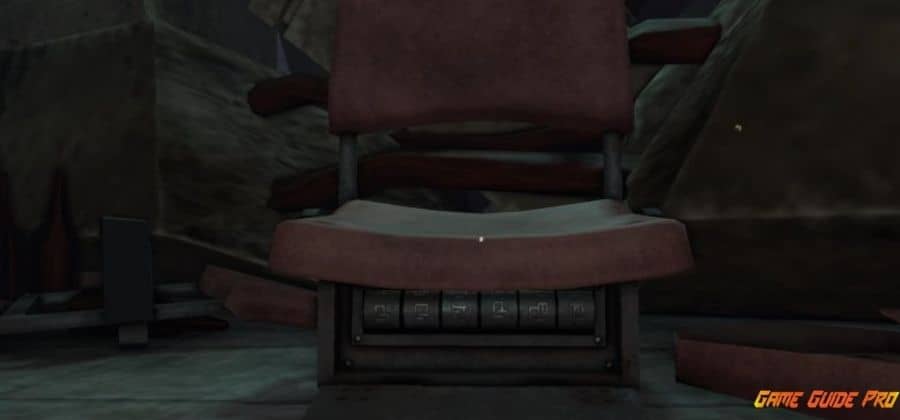
Now return to the corridor, follow it to the end and go down the stairs to the middle, where you can see a red chair. At the bottom of it, you can find an interaction point where a puzzle is hidden. A clue to the solution can be found in the diary that you got from Dunyasha.
The correct order of symbols is as follows: death, then sacrifice, then sorrow, followed by pain, and madness completes the cycle.
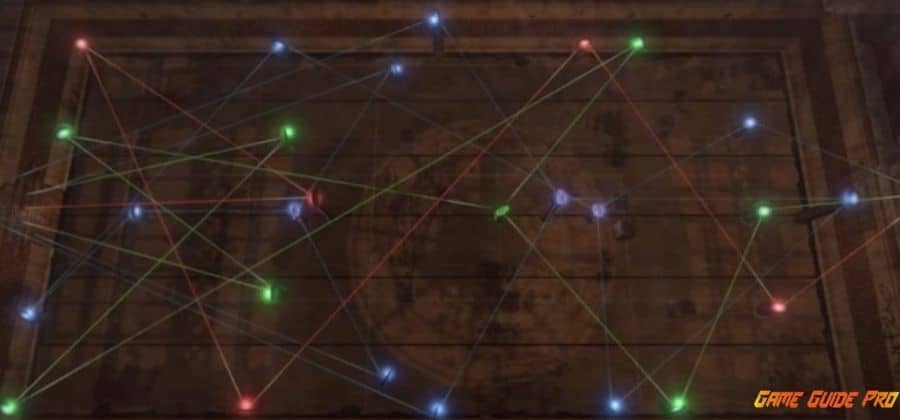
 If everything is done correctly, you need to open the seat and take another lens. When the job is done, return to the Yukol camp and move along the walls of the stadium. When you see the turn, go into it and head towards the high doors that lead to the hall with the pool. We rise to the tower, and there you can see three holes into which you need to insert lenses. The solution to the puzzle that opens is as follows:
 Now you just have to go downstairs and proceed inside the temple. After completing the cut-scene, you will be given a passage to the next location.
Location: Sacred Bridge (Syberia 3 Walkthrough)
Finally, on Syberia 3 Walkthrough; Keith finds herself in the finale of Syberia 3.
When the heroine wakes up, we need to go back to the yurt and get a knife and flint from the box. We leave outside and move towards the bridge, where Kurok should be waiting for you. After talking with him, go to the house, inside which there is a staircase. We go down, we find another ladder and again we move down. Find the lever and interact with it to activate the bridge.
Now we go upstairs and move to the suspended structure, knock on the window and talk to the customs officer. When he lets you pass, head to the Guardian’s tent, talk to him and read a prayer.
More on Syberia 3 Walkthrough; We return. After talking with the customs officer, do not worry when you see him running away. Go to the place where the bike was and pick up the brick from the ground. Going around the house on the other side, break the glass, and get inside. Search the table next to the window and take out the flask from the basket, and then go into the back room and take the customs papers from the table.
We go down the stairs on one floor, we pass into a room with stone walls and find a red button on the beam. We call the trolley, put a flask with liquid in it, and press the button again. Having received a bag of sawdust from the Guardian, go outside and go to the yurt. Next to her, talk to Ayyavaska, and then from the chest, standing to her right, take the wand.
We return to the Kurk, who stands next to the stove. Search it, taking every piece of resin you can find, a log, and 4 funnels. After that, go to the hemp located next to the stove, use a semicircle of resin on it and ignite it with a knife.
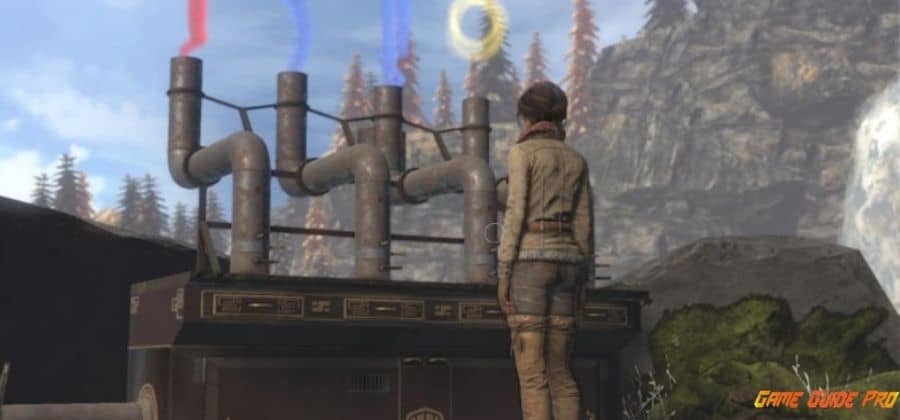
 When you get the required ingredient, you should place all the items in the oven in the following order:
Place the shaman’s wand in the middle, and then study it. He will show you what shape and color the smoke should be, which will come out of the pipes. Remember that the color depends on the resin and the shape depends on the funnel.
Now we turn the screen so that we can see the back of the stove and all 4 chimneys. We need to place funnels from 1 to 4 in them, moving from right to left.
- We put sawdust in the drawers (do not forget to close them later).
- We close the lower chimney (if anything, it is the lower left).
- We open the lower compartment and make a fire, using customs papers, a log, and a flint.
- Now we place the embers. By pressing the red button on the chimney, you will open the compartment in which you need to place the pieces of resin.
- Examine the handles. Lift the stand to see that there is another one at the bottom with a large hole.
Further on Syberia 3 Walkthrough, Upon completion of all the manipulations, your resins should be placed in the following order: red, then blue, blue again, and then yellow. Picture hint:
 If you do everything correctly, the final cut-scene will start at the end, and this will complete Syberia 3 Walkthrough.


Leave a Reply